When I originally rigged my Hobie Outback kayak for fishing I fitted a new Lowrance Elite 4 DSI fish finder and my existing Garmin 60Csx handheld GPS. The 60Csx is a well proven unit, one I’ve been using for several years now. It’s been used on and off the kayak and is loaded with Bluecharts, Topo maps and City Navigator providing full coverage of the UK and Eastern Europe in all areas. It’s survived capsizes, waves and heavy rain, no complaints whatsoever. The Elite 4 DSI has performed very well and I’ve continually been impressed with the picture quality. I fitted the transducer externally which required a little improvisation, though it ensures the best performance and it’s well worth the additional work.
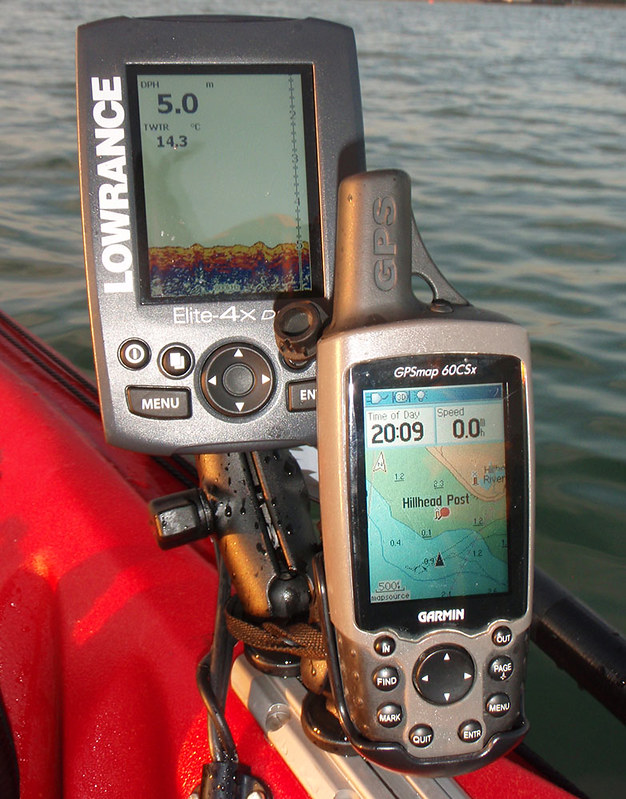
Garmin 60Csx with Lowrance elite 4 DSI and associated transducer
A few months ago I was offered a sponsorship deal from Lowrance. I was already impressed with what I’d experienced so I decided to take them up on their offer. I was asked what I’d like to fit to the kayak so I asked for the Elite 4 combo, however, they came back and offered me the soon to be released Elite 5 HDI combo. Wow!, that was more than I had dared to ask for, so I sat and waited patiently for the unit to be released in the UK (Sept 2013). I received a phone call from Lowrance whilst I was working the Hobie stand at the Southampton boat show asking me to pop to their stand and collect my new unit. On arrival I was told that they’d upgraded me, yes, they’d mentioned this previously. Nope, they’d upgraded me again!... sat there was a new Elite 7 HDI!, and it looked big!.
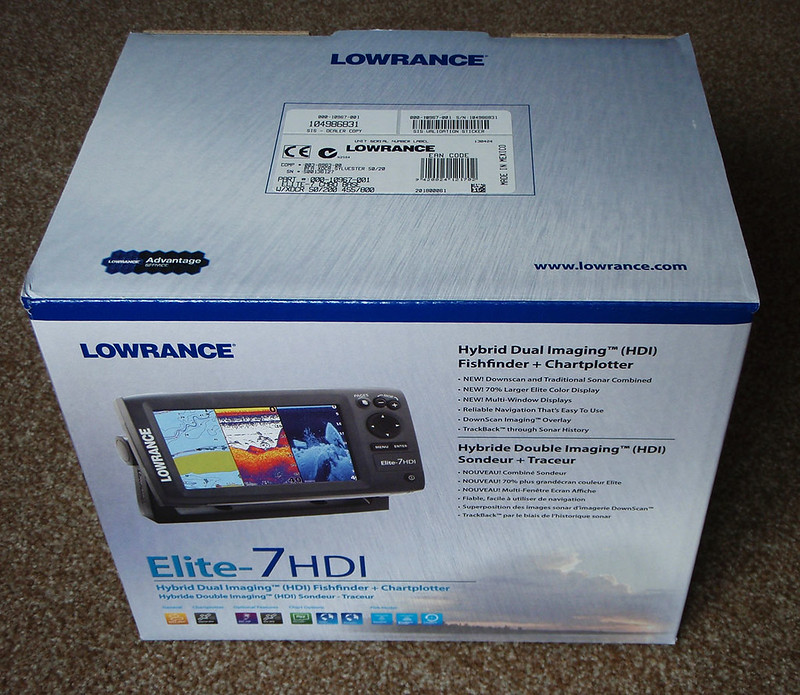
As much as I was extremely pleased and feeling very grateful, I couldn’t help but feel worried that the unit was too big, where was I going to fit it?!. Once back home I rummaged around the box, checking out the contents. There were clearly some issues to overcome if this was going to work and they were as follows:
• Where to mount the head unit
• How to mount the head unit
• Where to mount the transducer
• How to route the wiring
With regards to mounting the head unit I spoke to Bram Hullekes in the Netherlands as I’d heard that a couple of the Dutch guys had already utilised this particular unit. Some photos duly arrived in my inbox and they’d mounted the head unit forward, ahead of the user’s feet. As much as the unit is large, this made it a real stretch to reach the controls and even though the display was large, it perhaps wasn’t ideal when using the display in a split-screen mode. I really liked when I’d mounted the Elite 4 DSI on the starboard side on the foot well, attached to the kayak with a RAM mount affixed to a length of YakAttack’s GearTrac 175. However, the equivalent RAM mount for the Elite 7 was stupidly expensive, important one from the USA was going to set me back over £60!
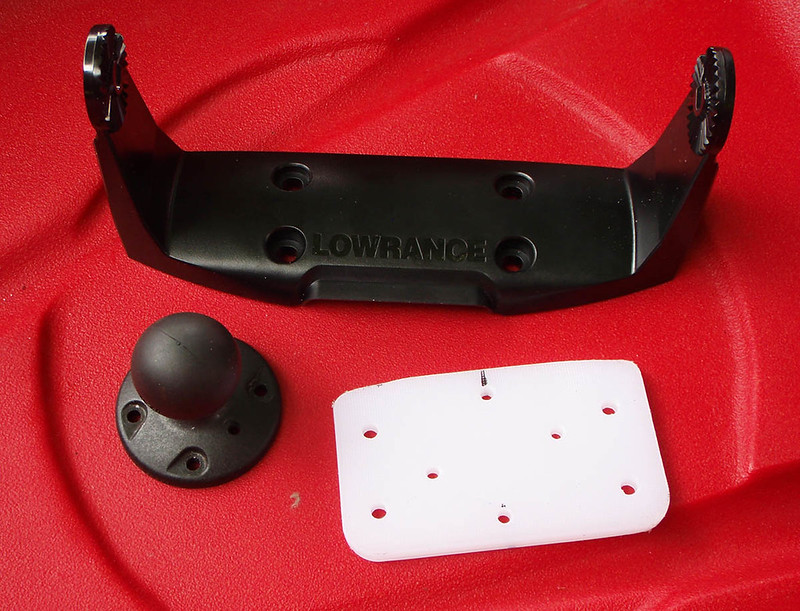
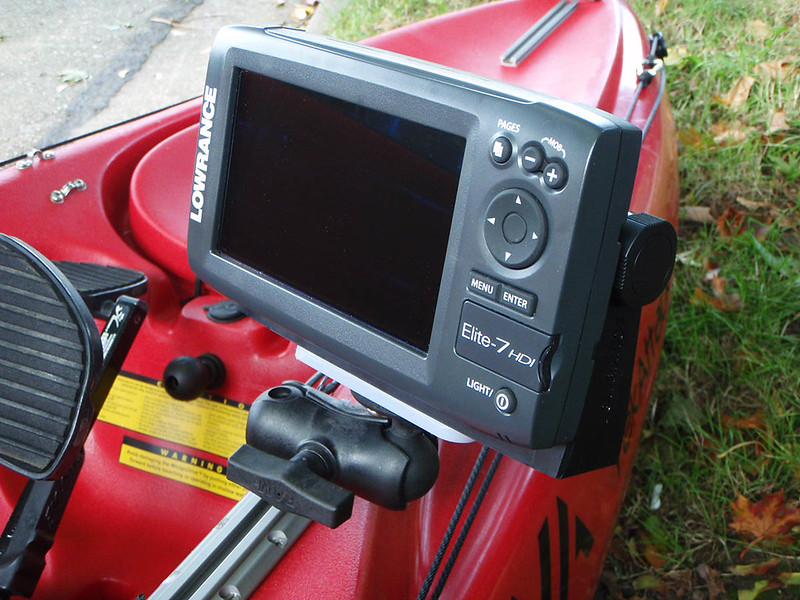
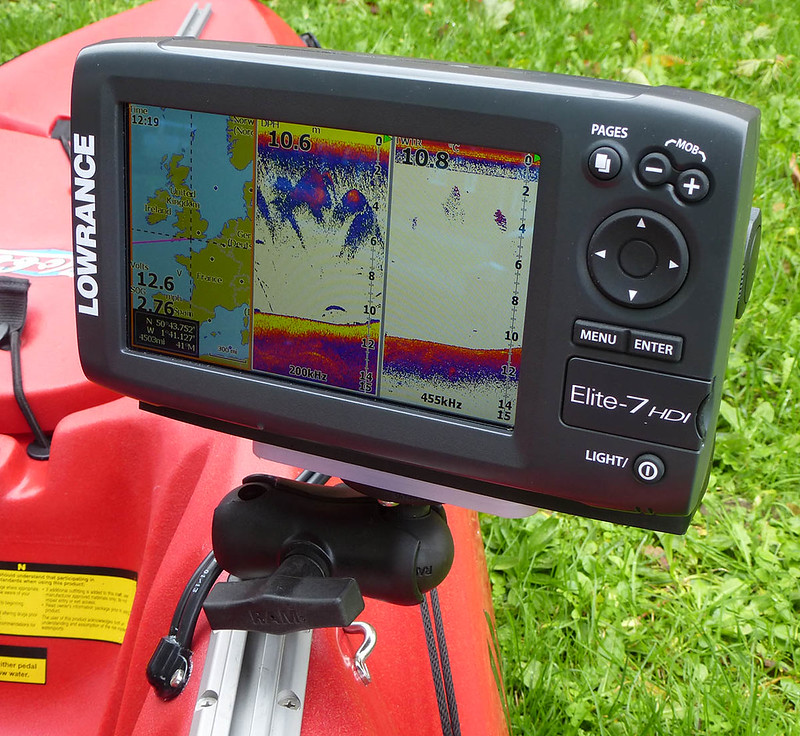
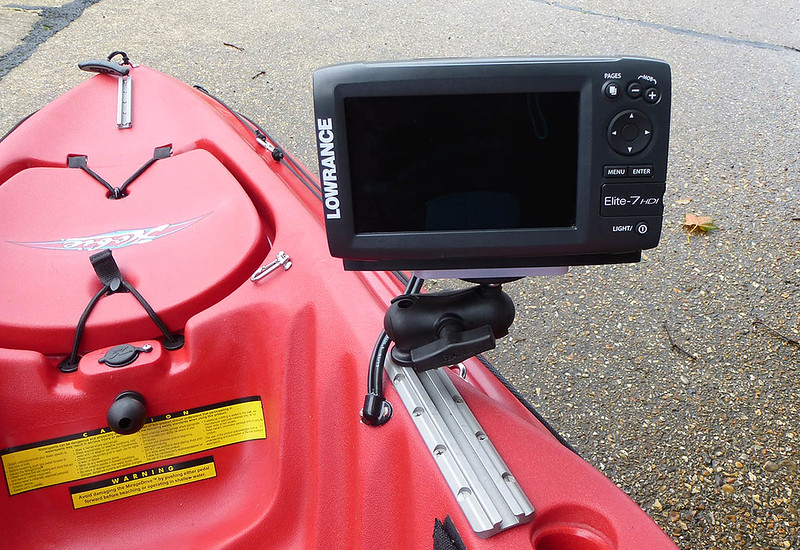
The head unit came supplied with a solid bracket design to be mounted to a solid flat surface, though after a little though I decided that it could be quite easily modified to accept a 1.5” RAM ball. I loosely rigged it up to a RAM ball using some ty-wraps just to see how it would look.
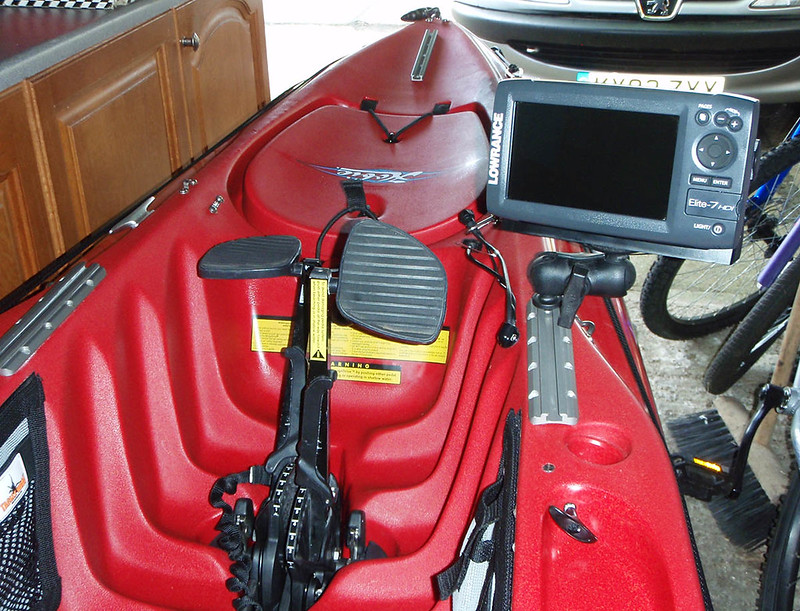
I used a short RAM double socket joint to move it away from the foot well do avoid being in the way whilst peddling. It appeared that it would be a solid mount that would permit a lot of adjustment fore and aft as required whilst being within arm’s reach, it seemed to just what I wanted.
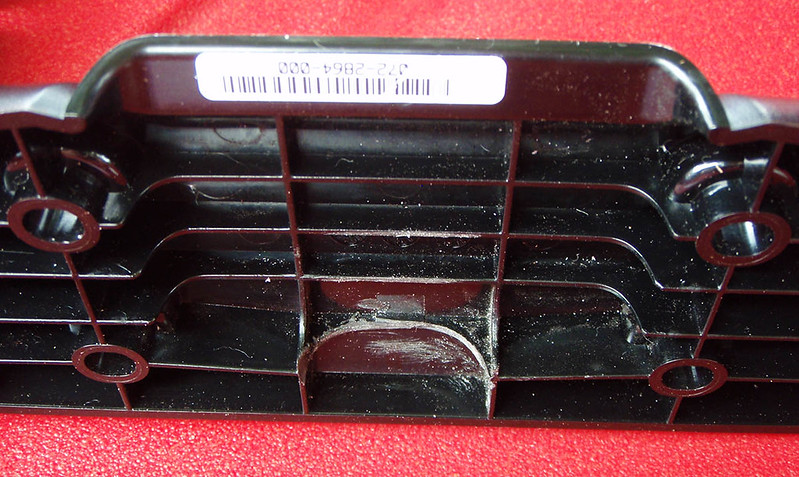
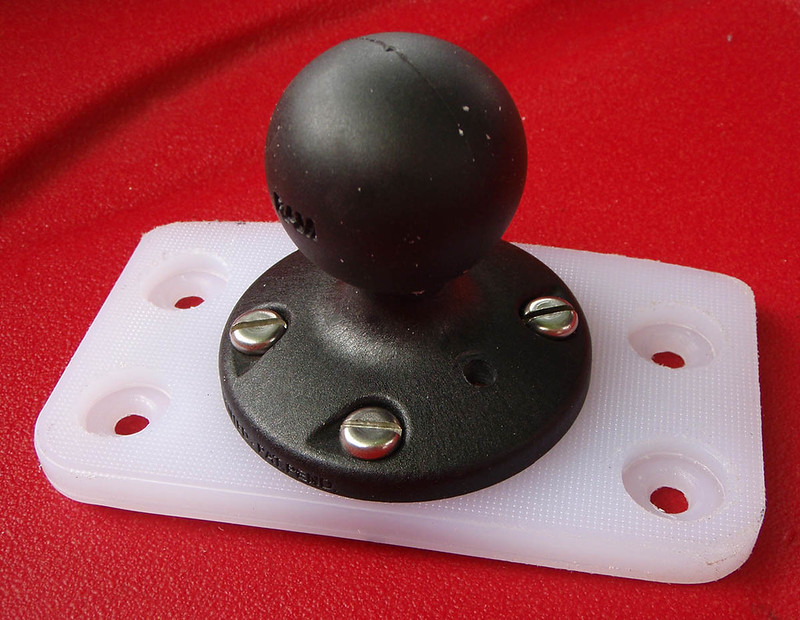
Modifying the factory head unit bracket turned out to be simple enough. I made a small adapter plate from nylon cutting board to permit the attachment of the 1.5” RAM ball. The holes were recessed as required to prevent the nuts from fouling the underside of the bracket of from looking too ugly. Part of the moulded structure was removed from the bracket to allow clearance for a nut. That was it, a straightforward and simple solution.
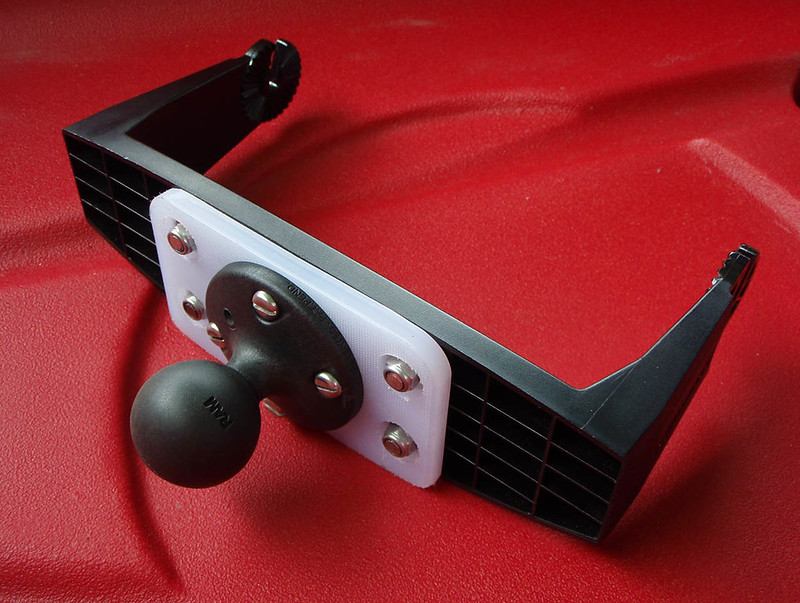
With the modified bracket fully assembled I took the opportunity to try it out and the result was a very solid mount. Considering the size and weight of the head unit it’d worked a treat.
That was the easy part of the rigging, the transducer had the potential to be a major headache!. It’s highly recommended that a down imaging (DI) transducer is mounted externally. Using a ‘shoot through the hull’ configuration degrades the performance. If you’re unsure about this here’s a great article to read on the subject. I’d mounted the transducer for my Elite 4 DSI through the seat scupper hole. This had required a little rework, the thread for the drain plug having being carefully removed with the use of a small sanding wheel mounted in a Dremel tool.
The Elite 7 HDI has the option of two transducers, the 83/200~455/800 & 50/200~455/800. They basically permit operation in different water depths.
Note! - there’s a big difference in the physical size of these two transducers!.
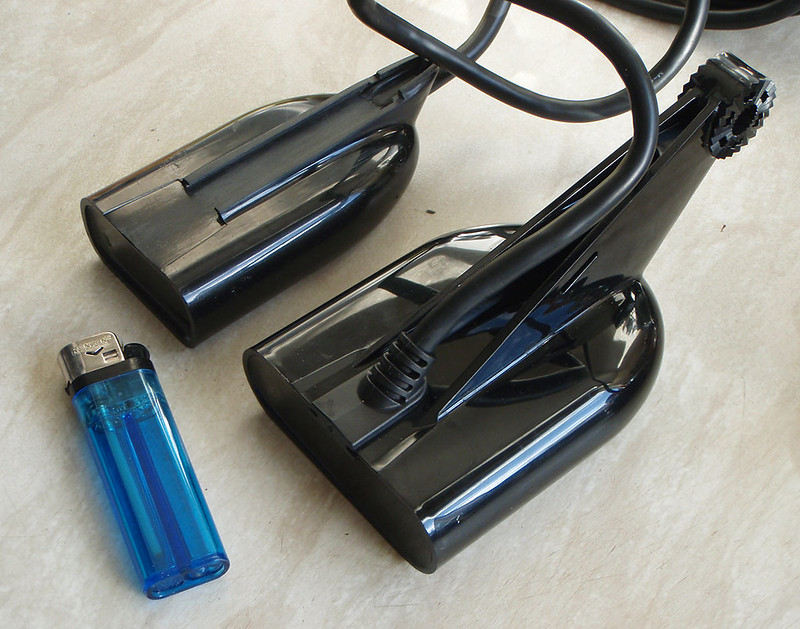
The 83/200 gives broadband sonar capability down to 305m, whereas the 50/200gives extended range down to 762m. Both give DI performance to 91m. I’ll rarely fish in water much over 100m deep, so it made sense to use the smaller unit. Also the mounting bracket of the smaller transducer is removable, whereas it a fully integrated in the 50/200 transducer.
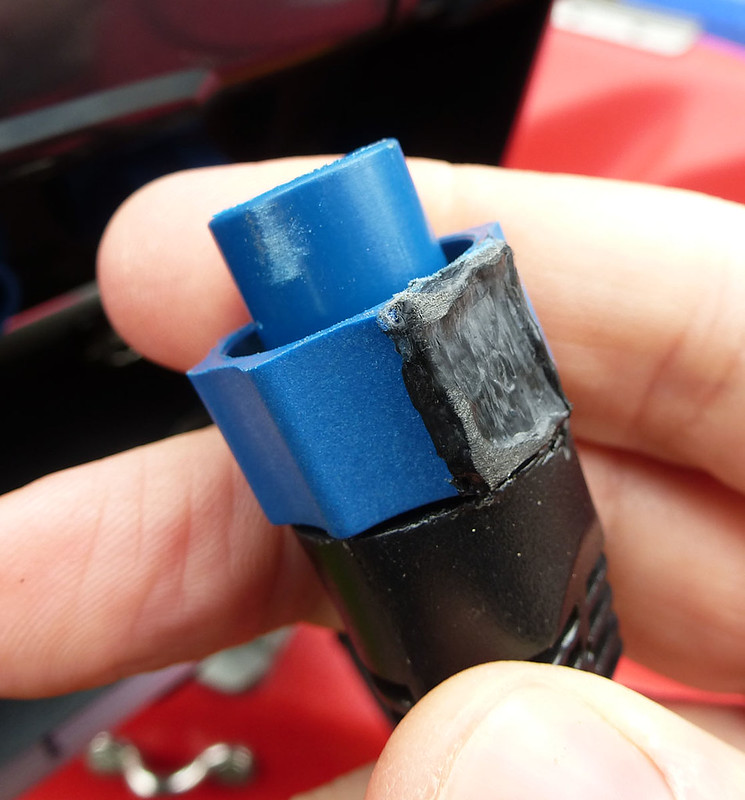
Ideally I wanted to mount it in the same location where the DSI transducer had been located. However, there were big problems! . The HDI transducer was much larger than the smaller cylindrical DSI item and with it sat within the hull contours of the Outback is was offset considerably from the scupper hole. I needed the transducer mounted hard up against the hull for maximum protection. There was one other problem, the electrical plug for the transducer was too big to fit through the modified scupper hole by 3-4mm. Now on paper that would have been the end of that plan, though there was a potential (risky?) solution to the latter problem.

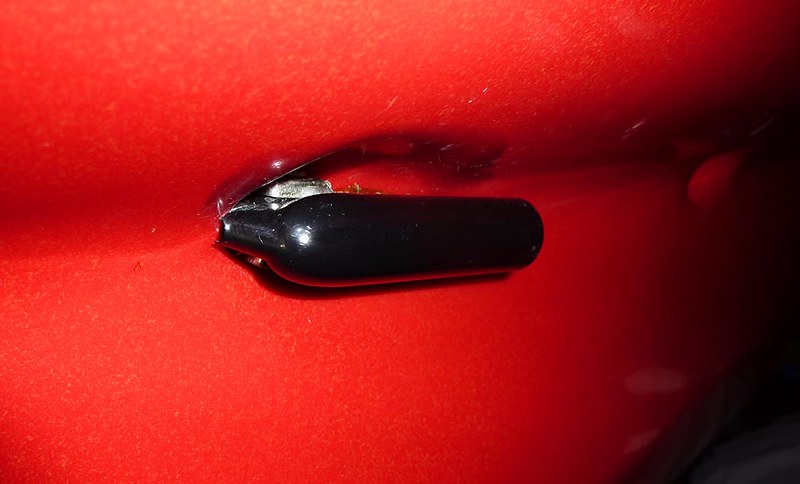
If the outer locking nut of the electrical plug was removed, it appeared that the lead would pass through the scupper hole. The problem was that the locking nut was not removable, the lead would need fully dismantling to remove it intact. On closer inspection I decided that the locking nut could be carefully cut off, a narrow slit along its length would permit it to be opened and slipped over the connector. It would of course require repairing once re-assembled. I decided to risk it, carefully cutting the locking nut and removing it from the lead. Sure enough, the cable was then able to pass through the scupper hole, but only just!. The locking nut was repaired later with a little plastic welding.
That still left the problem of mounting the transducer below the scupper hole. The DSI transducer had been much smaller and sat directly below the scupper hole. Some cutting and gluing of the mount had allowed the transducer to be mounted without too much difficulty, though this HDI transducer was going to need something very different!.
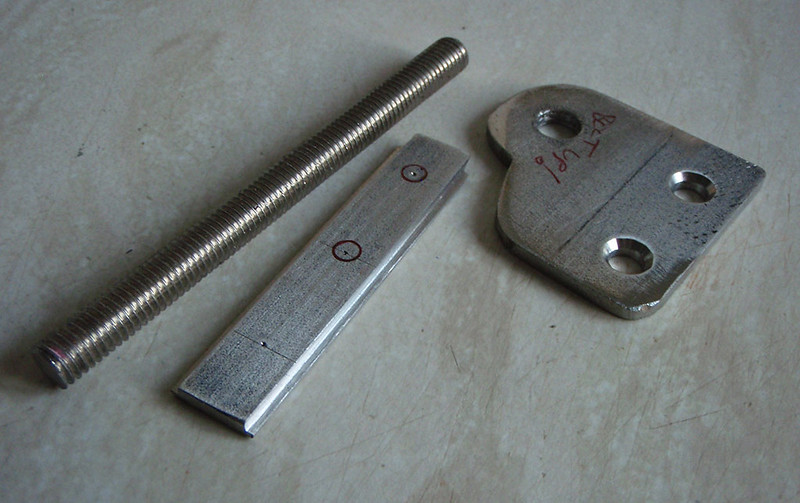
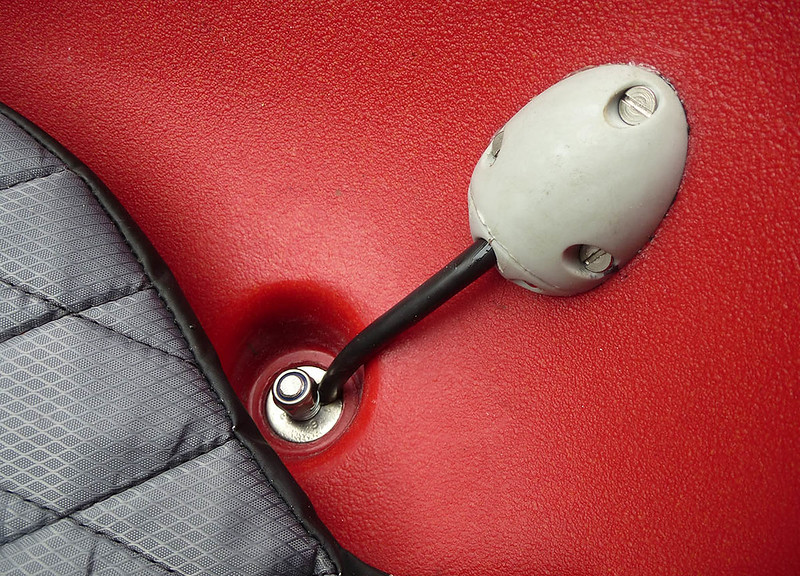
After a lot of head scratching I’d hatch a plan. The transducer was to be mounted directly to a custom stainless bracket with an offset mounting stud. The original plastic mount was to be ditched. The basic material was 3mm stainless steel plate, the mount itself being constructed from two pieces.
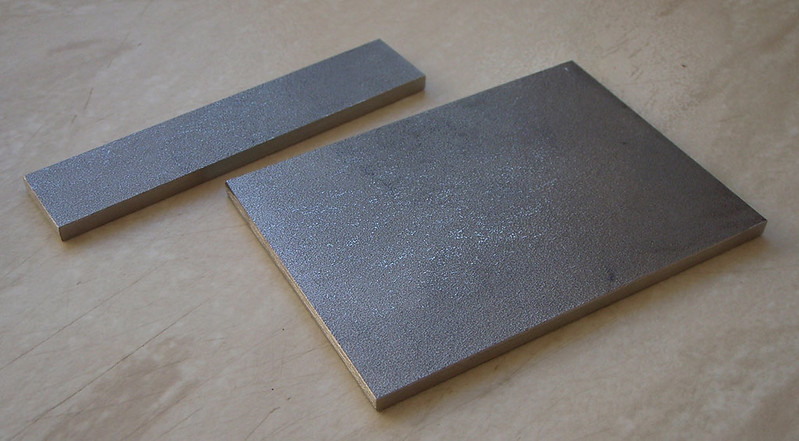
The smaller piece was required to slide into the slot where the original plastic mount had been located. Two raised plastic guides had to be filed out first. The lower mounting plate needed to fit into the grooved slot and this profile was carefully milled into the plate.


The upper mounting plate was drilled to allow it to be welded to the lower grooved section. An 8mm stainless stud would then be welded into the upper mounting plate. There was some tweaking required during construction and the upper mounting plate was contoured to fit snugly within the opening of the scupper hole.
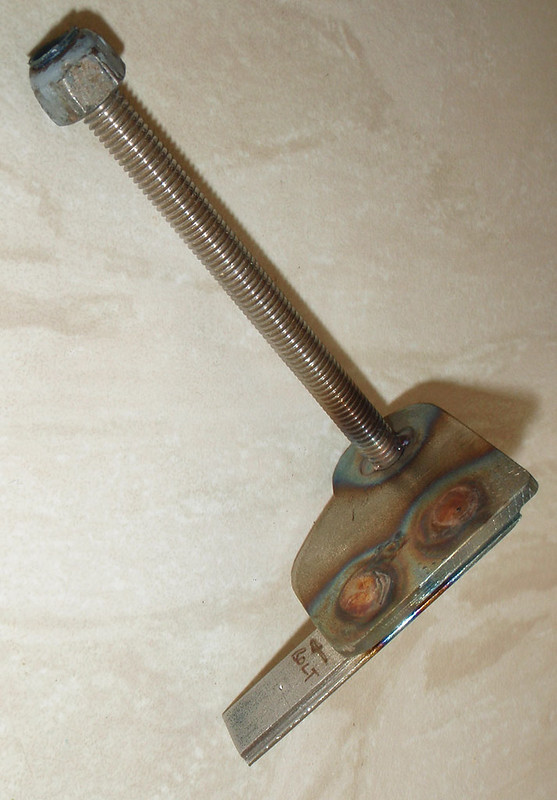
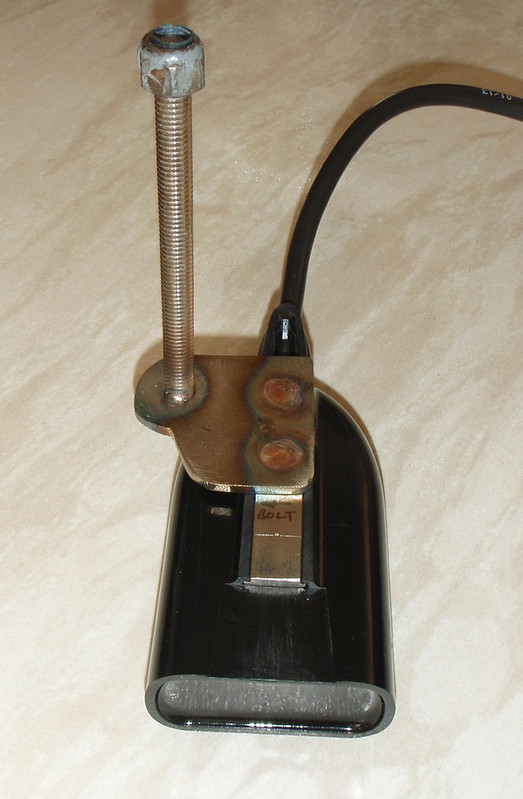
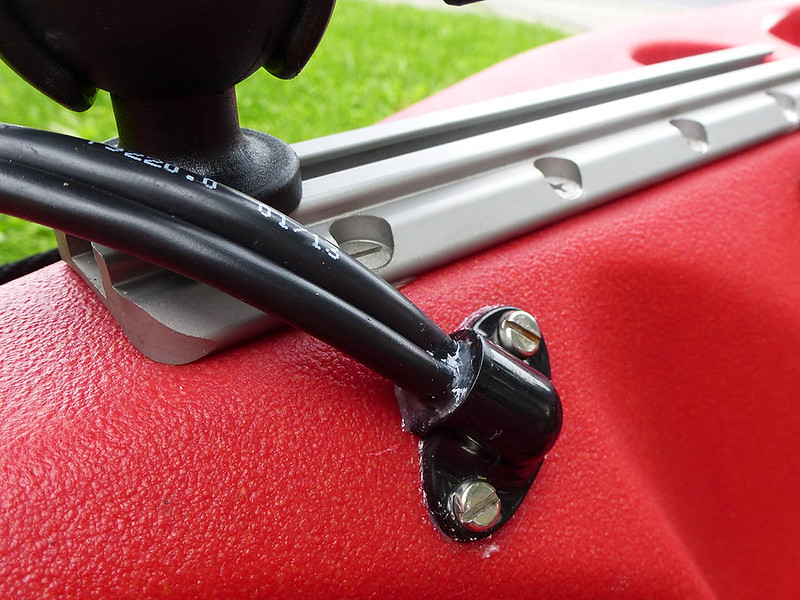
The result was extremely pleasing, probably better than I’d hoped for!. The transducer sat hard up against the scupper hole, sitting well within the profile of the Outback’s bulbous hull. It tightened up easily and I used a small section of foam to ensure that it sat horizontal to the deck. The contoured plate had fitted so well that there was absolutely no gap to pass the transducer cable through. Out came the angle grinder and a minute later a nicely shaped slot existed to pass the cable through, job done!
I’d previously fitted a side-exit cable gland in the seat area to permit the DSI transducer cable to re-enter the hull. I re-used this gland in exactly the same manner. The cable re-appears on the starboard side next to a length of 8” GearTrac where it emerges and connects to the head unit.
The power lead to the head unit also uses this exit point and is connected to the main wiring loom within the hull.
I’d originally used a 12aH battery on my big Game kayak, though I’d downgraded to a 7aH battery on my Outback. As the current draw of the Elite 7 HDI would no doubt be considerably higher than the Elite 4 DSI I’ve swapped the battery back to the 12aH unit.
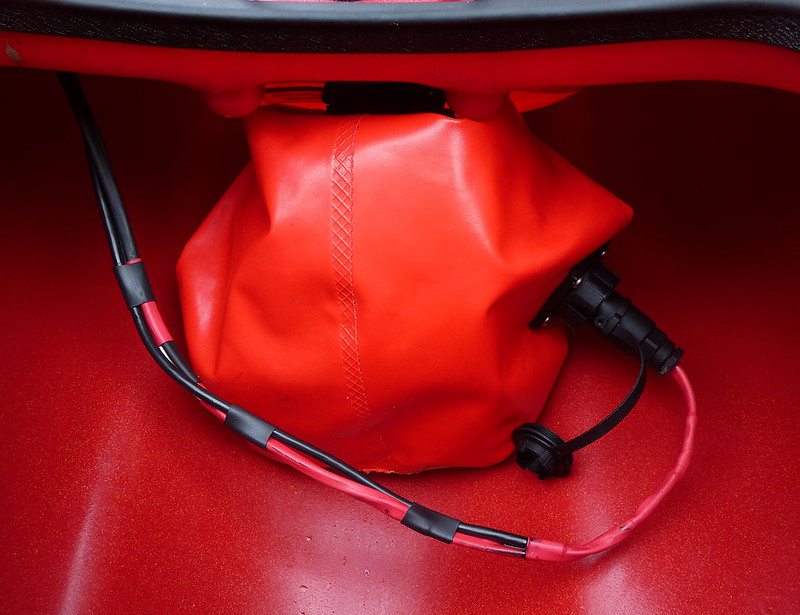
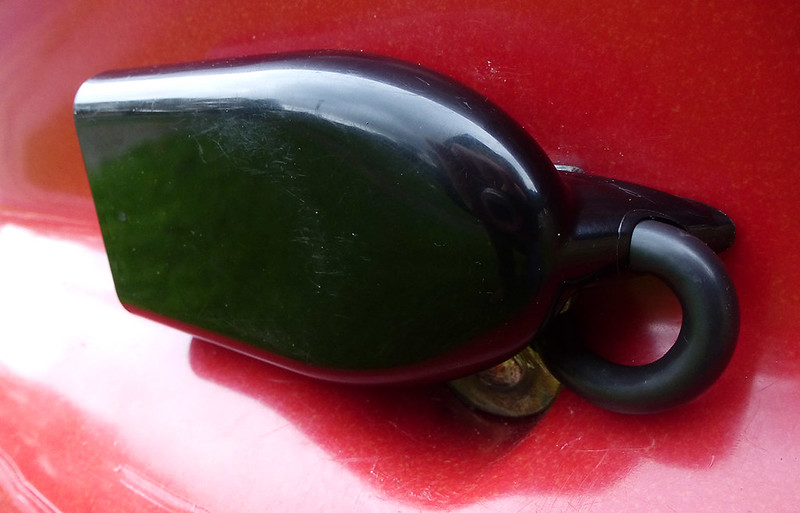
So that’s the installation completed. The loom is protected with heat shrink and fully sealed with Raychem S1125 adhesive. This creates a fully watertight, yet flexible loom. The main battery supplies power to a bilge pump and navigation light, hence the additional amperage of the battery. The finished result is clean and tidy, the head unit is mounted solidly to the kayak, with the transducer is mounted externally and well protected up against the hull of the kayak.

As I clock up some time using this unit I’ll provide some feedback as to its performance on the water. It’ll be nice to have the GPS and fish finder fully integrated as well as being able to compare broadband and DI sounder readings side by side. I’ll be purchasing a Navionics Gold card to cover the UK to make the most of the chart plotter facility.