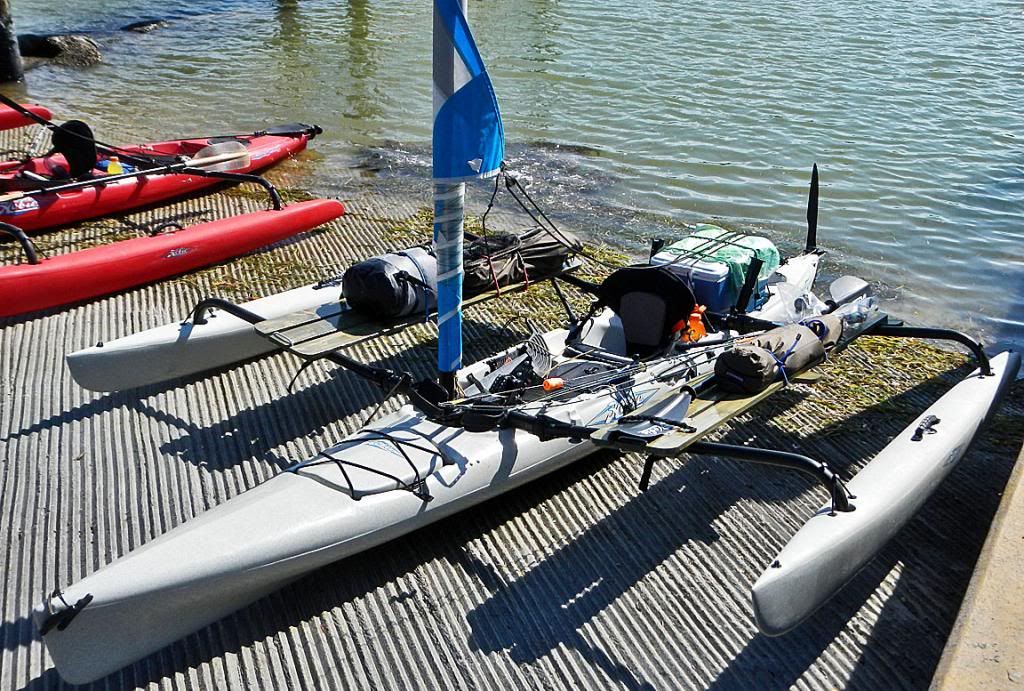
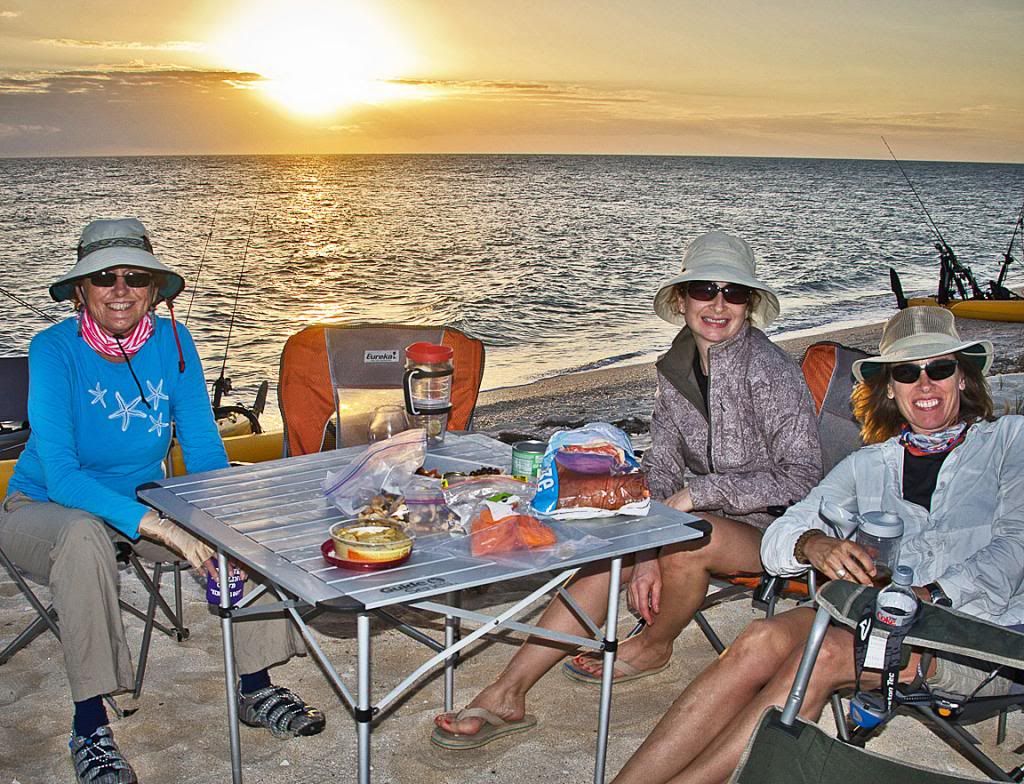
Construction of Expedition HakasConstruction, Materials, Costs, Tools, TimeThis describes the construction of my second pair of hakas. I constructed 2 pairs in the last 6 weeks. Hakas have great potential for camping trips. They can carry items that have regularly been stored in the hull, e.g., camp chairs, tent/poles/stakes, tarp/poles, Dromedary water containers, a dry set of clothes—all in dry bags as necessary. Loading the hakas should be done with an eye to keeping the boat level. A haka can even be used as a camp table. On the negative side, the hakas add their weight to your load. Therefore, having a set of light-weight hakas is desirable.
The DesignMy goal in the design and construction of this pair of 3-board hakas was to keep the weight down. The weight was reduced by using all aluminum framing to fasten the three 6’x1”x4” boards together. Stainless steel screws/bolts were also used. When finished, the hakas weighed 22# (10 kg) total. Surprisingly, the materials cost for my 2 sets of hakas was almost the same. On the other hand, without doubt, this method of construction is easier than that of my originals. The link to my original haka construction:
viewtopic.php?f=69&t=37645&p=200342#p200342 These hakas are not as strong as my originals, but each of these hakas will support my weight (200#) on center when used as a bench. Finally, since no glue was used in this construction, the hakas can be easily be disassembled for repairs and/or re-varnishing.
Steps in constructionCollect materials..................Cost (US$)• 6 regular pine (whitewood) 6’x1”x4” boards. Go to Home Depot for these.
Pick out 6 good boards. If they don’t have 6 good boards, go to another HOPO. 16.50
• 120 Grit sandpaper 4.
• 220 Grit sandpaper 4
• Hand sander 8.
• 1 qt MinWax gray stain 7.75
• 1 qt McClosky Marine Spar Varnish 28.
• 1 pt Bottle turpentine 5.
• 1 pt Bottle paint thinner 6.
• 1 paint containers 1.80
• 2” Oil Paint brush, flat cut 6.70
• 2 Aluminum flat bars, 48”x3/4”x1/8” 8.50
• 1 Aluminum angle, 96”x1.5”x1/16” 18.50
• 2 Aluminum angle, 36”x1”x1/16” 10.75
• 7’ 5/16” Bungee cord 9.50
• 1” square dowel cut into 2” lengths (8 total) 3.25
• 4 Boxes of 25 each of SS pan head screws, #10 x 3/4” 27.
• 2 Boxes of 50 each SS pan head screws, #6 x ½” 14.
• 100 #10 nylon washers 6.
• 3 ¼”x#20x1” SS bolts w/ nylon lock nuts and ¼” nylon flat washers 4.50
• 12 eye pads 5.
• Bungee cord clip 3.
Total $198Regarding cost, I have enough varnish, stain, 1.5”x1/16” aluminum angle, paint thinner, paint brush, and hand sander to build another set. So, the real cost of materials for 1 set of hakas is closer to $160. To realize this saving, you would have to have a buddy build a set & share these materials.
Tools needed• 2 Saw horses—Stanley 32” adjustable sawhorses are great.
• C-clamps—I have 4 2”, 2 3”, 2 4”
• 2 Irwin 24” Bar Clamp/Spreader
• Hand clamps, bag of 8 of different sizes—these are definitely useful and they are cheap.
• Jig saw w/ metal and wood blades
• Electric drill with variety of drill and driver bits
• 16”x24” framing square—I used 2 of these.
• 12” Bastard file
• Some common hand screw drivers
• Metal punch
Building these hakas is straight-forward. Here is a schematic of the underside of a haka.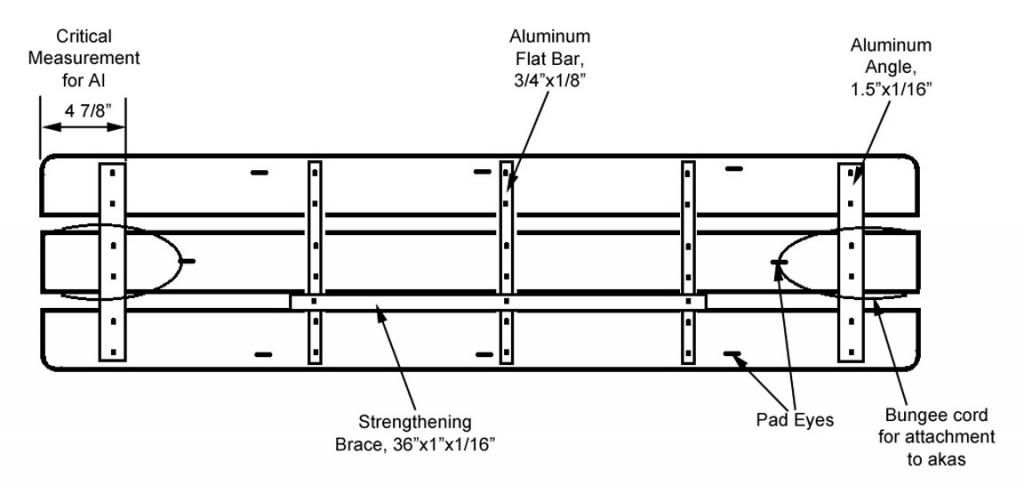 Day 1 Prepare the boards and stain.
 With a jig saw, round the corners (8 total) on 4 of the boards. Using 120 grit sand paper and the hand sander, sand all edges, ends, etc. to have smooth, splinter-free boards. Use a tack cloth to remove wood dust, and then stain the boards—paint stain on and, then, wipe it off thoroughly. To prevent the boards from warping overnight, I used the Irwin clamps to clamp them all together (6 boards) with 1” spacers at each end. When they were clamped, they looked like a 6-board haka. This clamped, 6-board haka was straddling my sawhorses. Then, I placed some serious weight on the boards at each saw horse, i.e., I added at least 6 heavy bricks to hold the boards flat on the sawhorses. Allow to dry for 24 hrs. There was minor warping. (4 hrs.)
Boards before staining: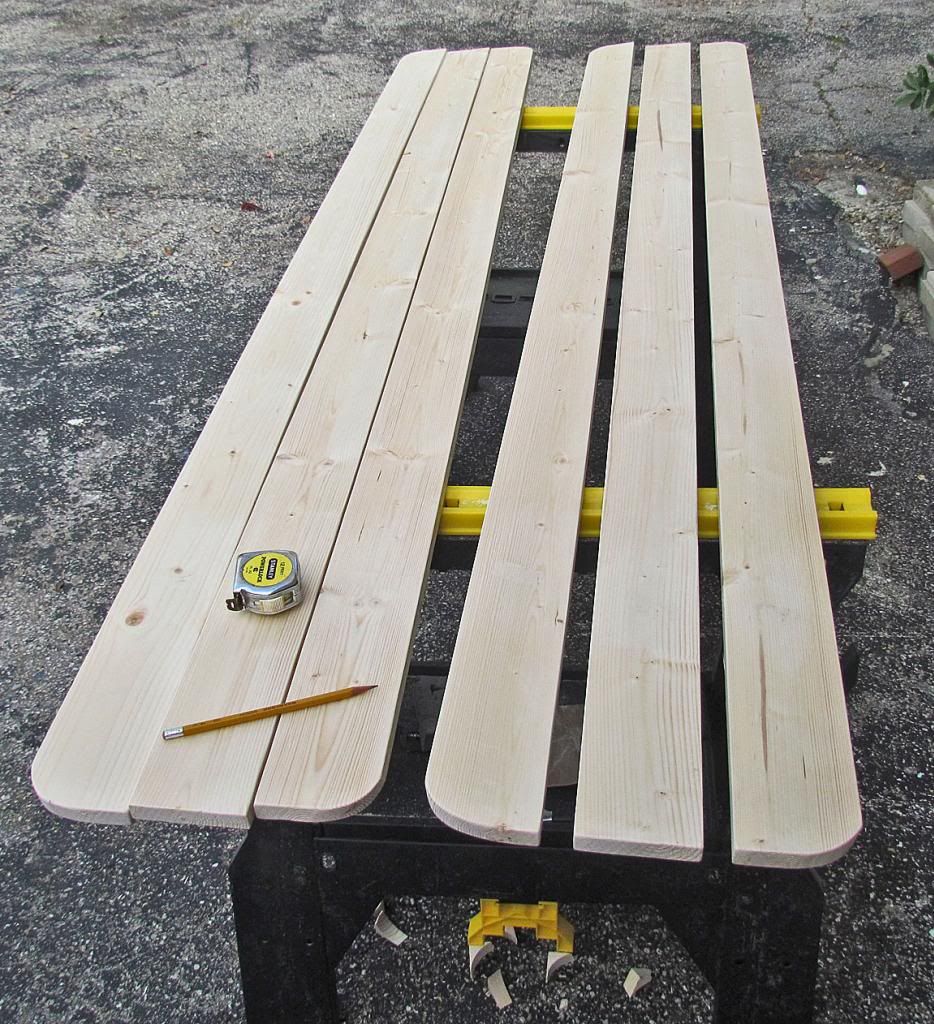 Day 2
Day 2 After 24 hrs, sand the boards with 120 grit sandpaper. Eliminate all roughness in this step. Use a tack cloth to remove the wood dust. Apply the first coat of varnish. Some tips on varnishing. (1) Never shake a can of varnish. Stir the varnish thoroughly with a paint stick. Try not to generate any bubbles. Do not press your brush against the lip of the varnish can to remove excess varnish—that causes bubbles. (2) Pour about 1/5 of the varnish into a paint container. This is the varnish you will be using. (3) Dilute the varnish about 10-20% with paint thinner. Stir carefully to mix well. (4) Apply the varnish. All brush strokes should be the same direction. (1 hr)
Day 3 After 24 hrs, sand the boards with 220 grit paper. Apply 2nd coat of varnish as above. (45 min)
Day 4 After 24 hrs, sand the boards with 220 grit paper. Apply 3rd coat of varnish as above. (45 min)
Day 5 For personal reasons, there was a break of about 3 days here. This allowed the varnish to dry thoroughly before proceeding. During this time, prepare most of the aluminum hardware—cut it to length, drill holes for screws, file sharp edges & corners. (1.5 hr)
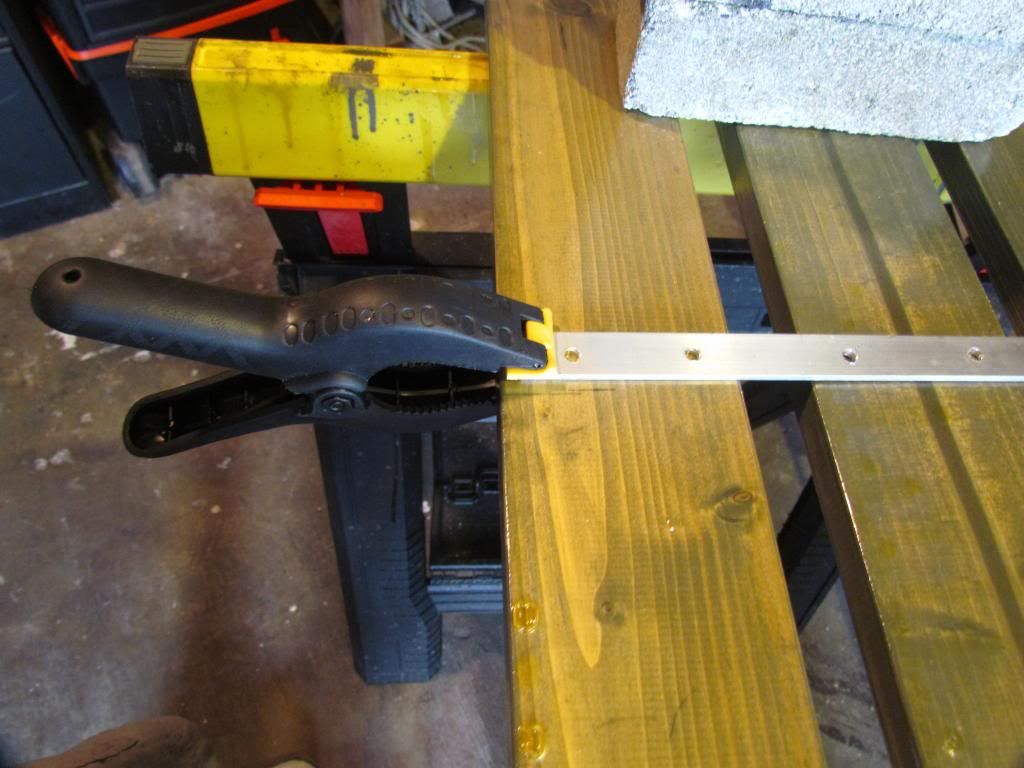
Day 6 Assemble a haka. Be sure the sawhorses are absolutely level. Use the Irwin Bar clamps to clamp 3 haka boards in position. At each end, separate the 3 boards with spacers (the 1” square dowel cut in 2” lengths.) Use the large framing square to make sure everything is square—that is, the ends are at a right angle to the sides of the boards. Attach the 1.5”x1/16” aluminum angle at each end using the #10x3/4” SS screws. Pre-drill each screw hole and add a drop or 2 of silicone goop to each drilled hole before setting the screw.
View showing an aluminum angle (1.5”x1/16”) clamped and ready to fasten with SS screws. 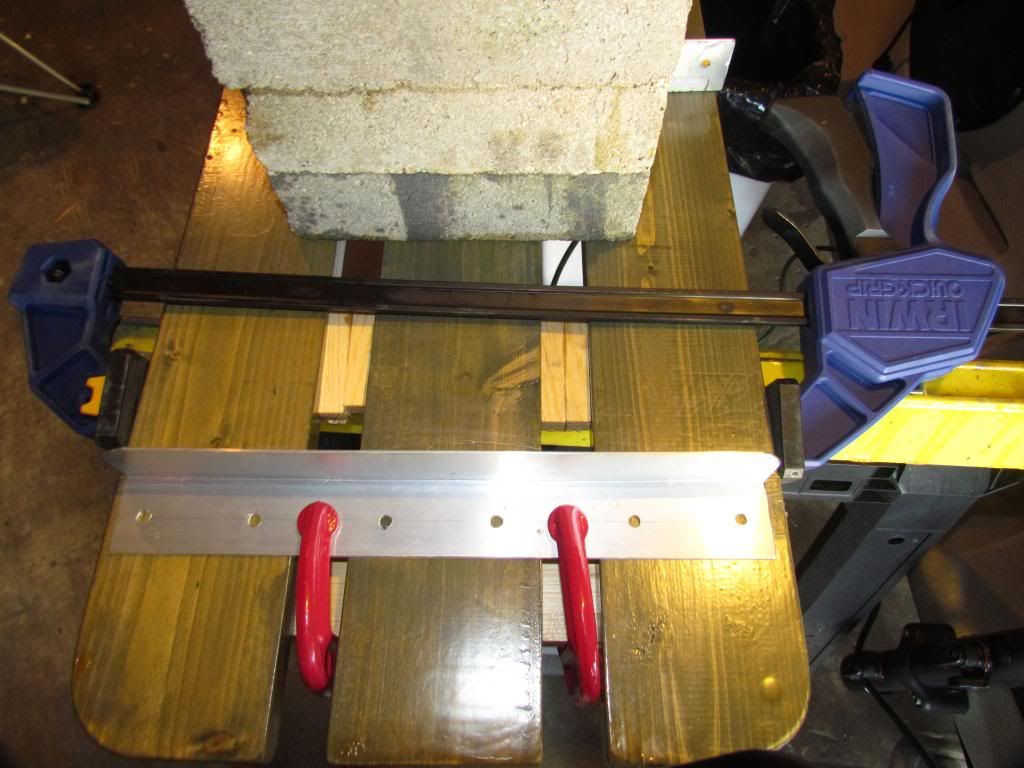
Then, attach the 3 aluminum cross bars with six #10x¾” pan head screws. Pre-drill each screw hole and add a drop or 2 of silicone goop to each drilled hole before setting the screw. Remove the spacers.
View showing a hand clamp holding an aluminum bar. It is ready to fasten with SS screws.
Now, there are just a few more items.
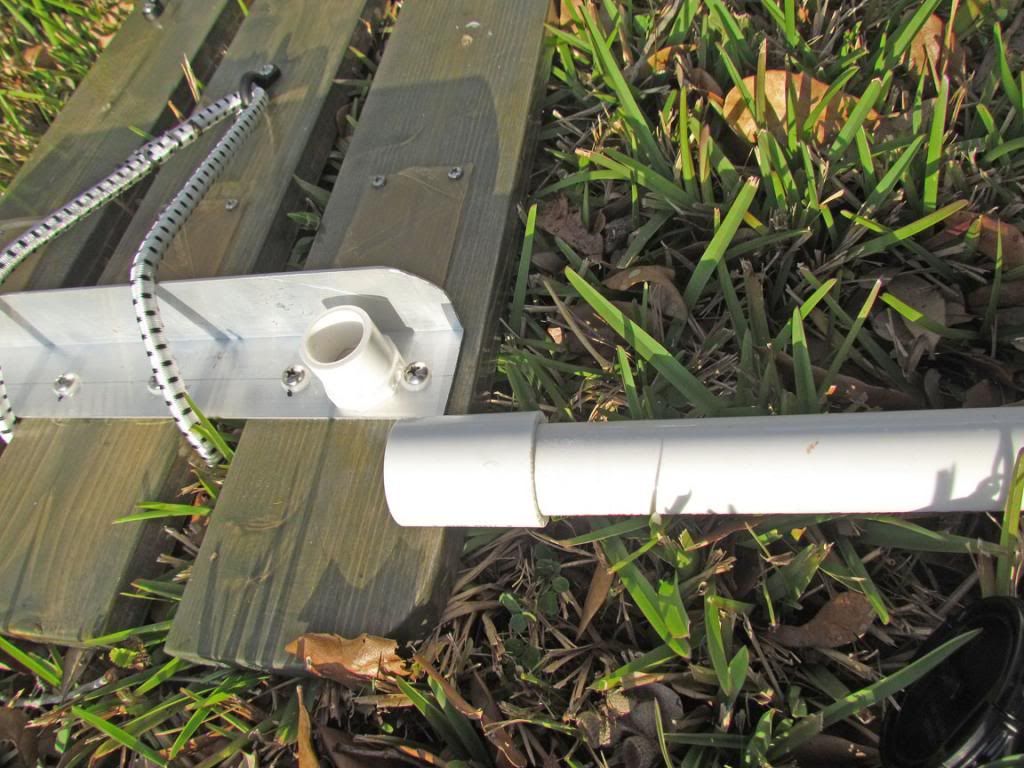
(1) Attach the permanent bungee cord to fasten the hakas to the akas.
(2) Attach the stiffening brace—use ¼” bolts & nylon lock nuts. Use nylon flat washers to isolate steel bolts from aluminum brace.
(3) Add 6 pad eyes for attachment of bungee cords.
(4) Attach 6 protective bumpers (heavy plastic or rubber strips) under each haka to protect the aka. Use the #6x½” pan head screws.
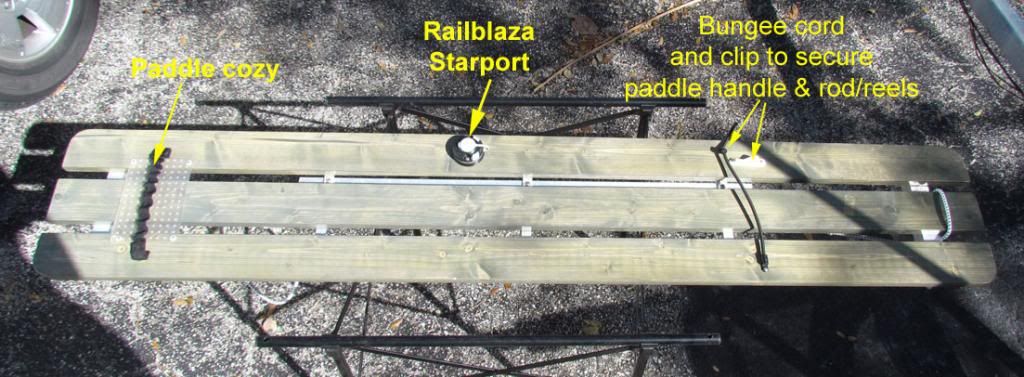
(5) Attach the paddle cozy and bungee cord/clip. (3 hrs)
Day 7 [b]Assemble 2nd haka. (3 hrs)
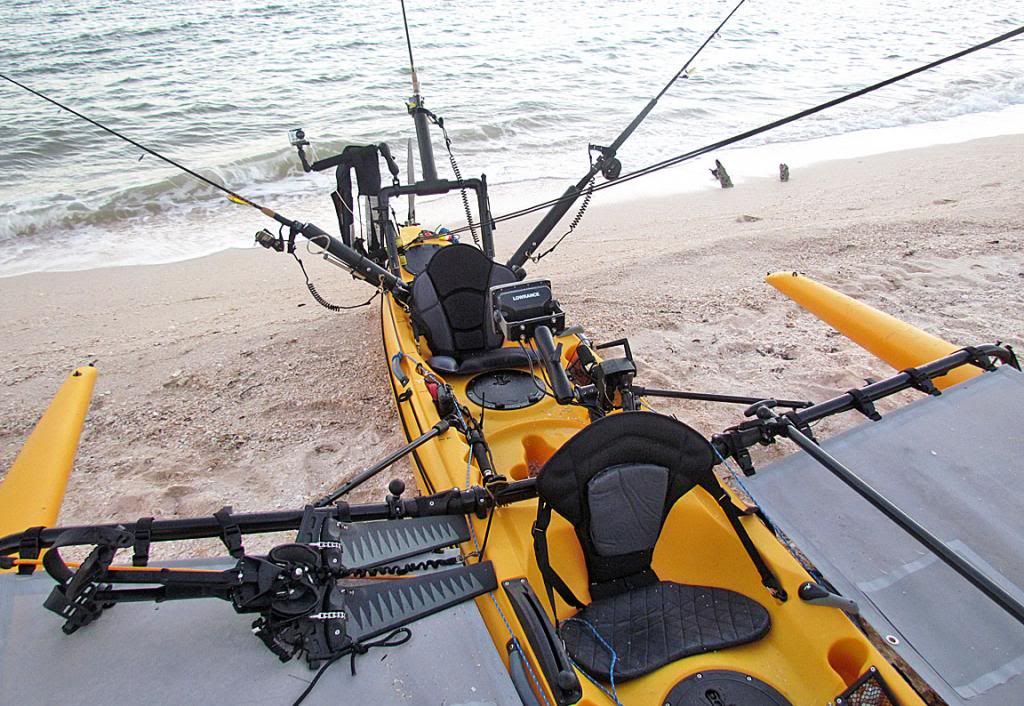
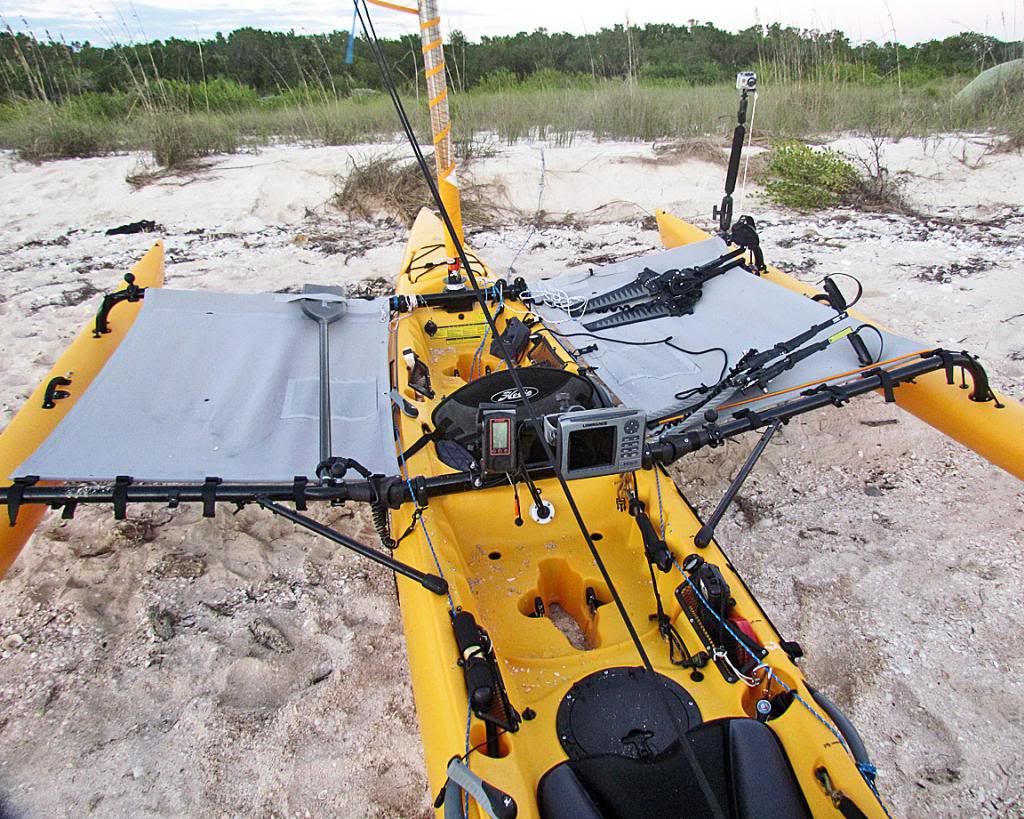
Time of construction: ca 14 hrs..........Weight of finished hakas: 22 # (10 kg)Top view of one haka. Paddle cozy was attached to one haka. RailBlaza Starports were attached to each haka.
 Underside of one haka.
 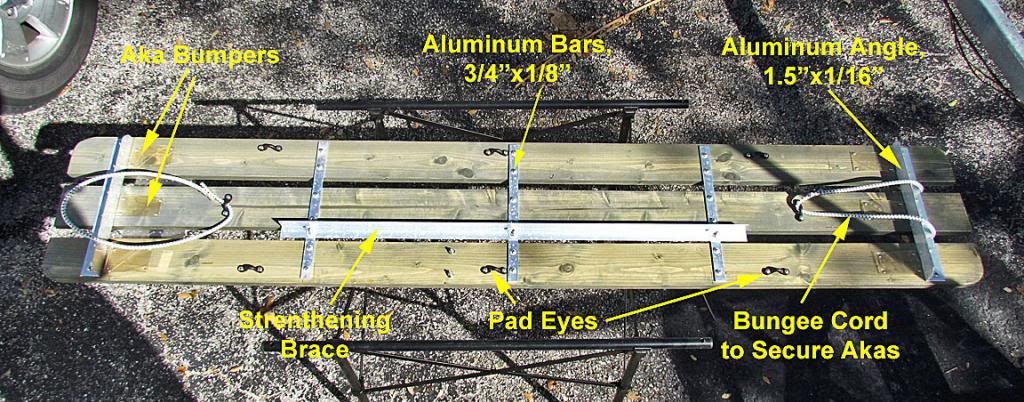 Haka table
 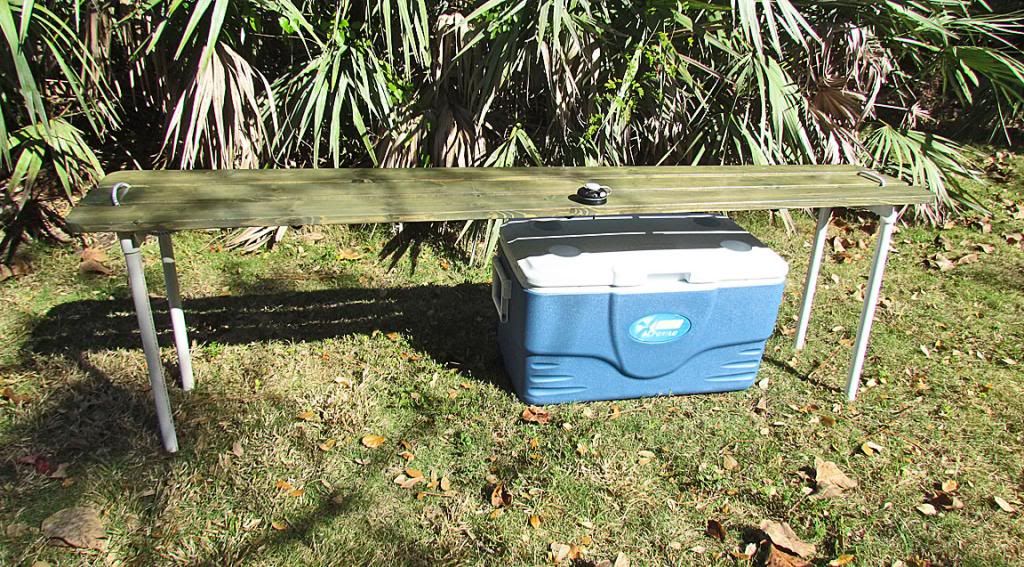 Warning: the bungee loop, as shown in this picture of the table, is too loose. To secure the haka to the aka, loop the bungee over 2 (two) of boards.
 Keith
Quote:
Because of this thread length, I have made a Table of Contents. This Table is on P. 22, http://www.hobiecat.com/forums/viewtopic.php?f=70&t=7276&start=315