Return to Hobie.com
Hobie Forums
It is currently Tue Apr 23, 2024 2:31 am

All times are UTC - 8 hours [ DST ]


Post new topic Reply to topic  [ 14 posts ] 
Author Message
PostPosted: Thu Jul 23, 2015 8:19 pm 
Offline
Site Rank - Captain

Joined: Thu Sep 25, 2014 3:08 pm
Posts: 63
I am trying to figure out where to mount the Scotty 1050 Downrigger and am trying to figure something out and figured i'd get the masses thoughts on this.

I have seen some great ideas on mounting this thing but there are a few issues for my setup.

I like the removable one that was made to go in front of the seat. The issue i have is when test fitting around the yak i cant help but notice when peddling that it would tap my legs and just feel right in the way. I have to assume that if i had the seat in the high position i wouldn't get that feeling but as an ocean fisherman i prefer to keep my butt lower to the deck unless it is the rare glassy day. (very smart mounting system tho!)

The one plug and play one behind the seat rocks but my livewell takes up all the room in the back and is important to keep the big bait alive. And it just makes it not an option. as much as i would like to have it back there.

I have the spring creek outriggers which has the metal tubing all the way across the back and thought about mounting it right to that but i think i want to avoid it because it would ultimately interfere with the outrigger being deployed quickly if i need it and interfere with the normal operation of them.

The best idea so far is the rail.....

Scotty makes the standard rail mount but with the H-rail i wonder how well it will get a "Bite".
My thought is i have 2 of the universal mounts that i am thinking mount a piece of cutting board to then mount the downrigger base right to the tandem h-rail mount setup. I am thinking two to share the load of a 4lbs ball on the rig as well as bait/lure.

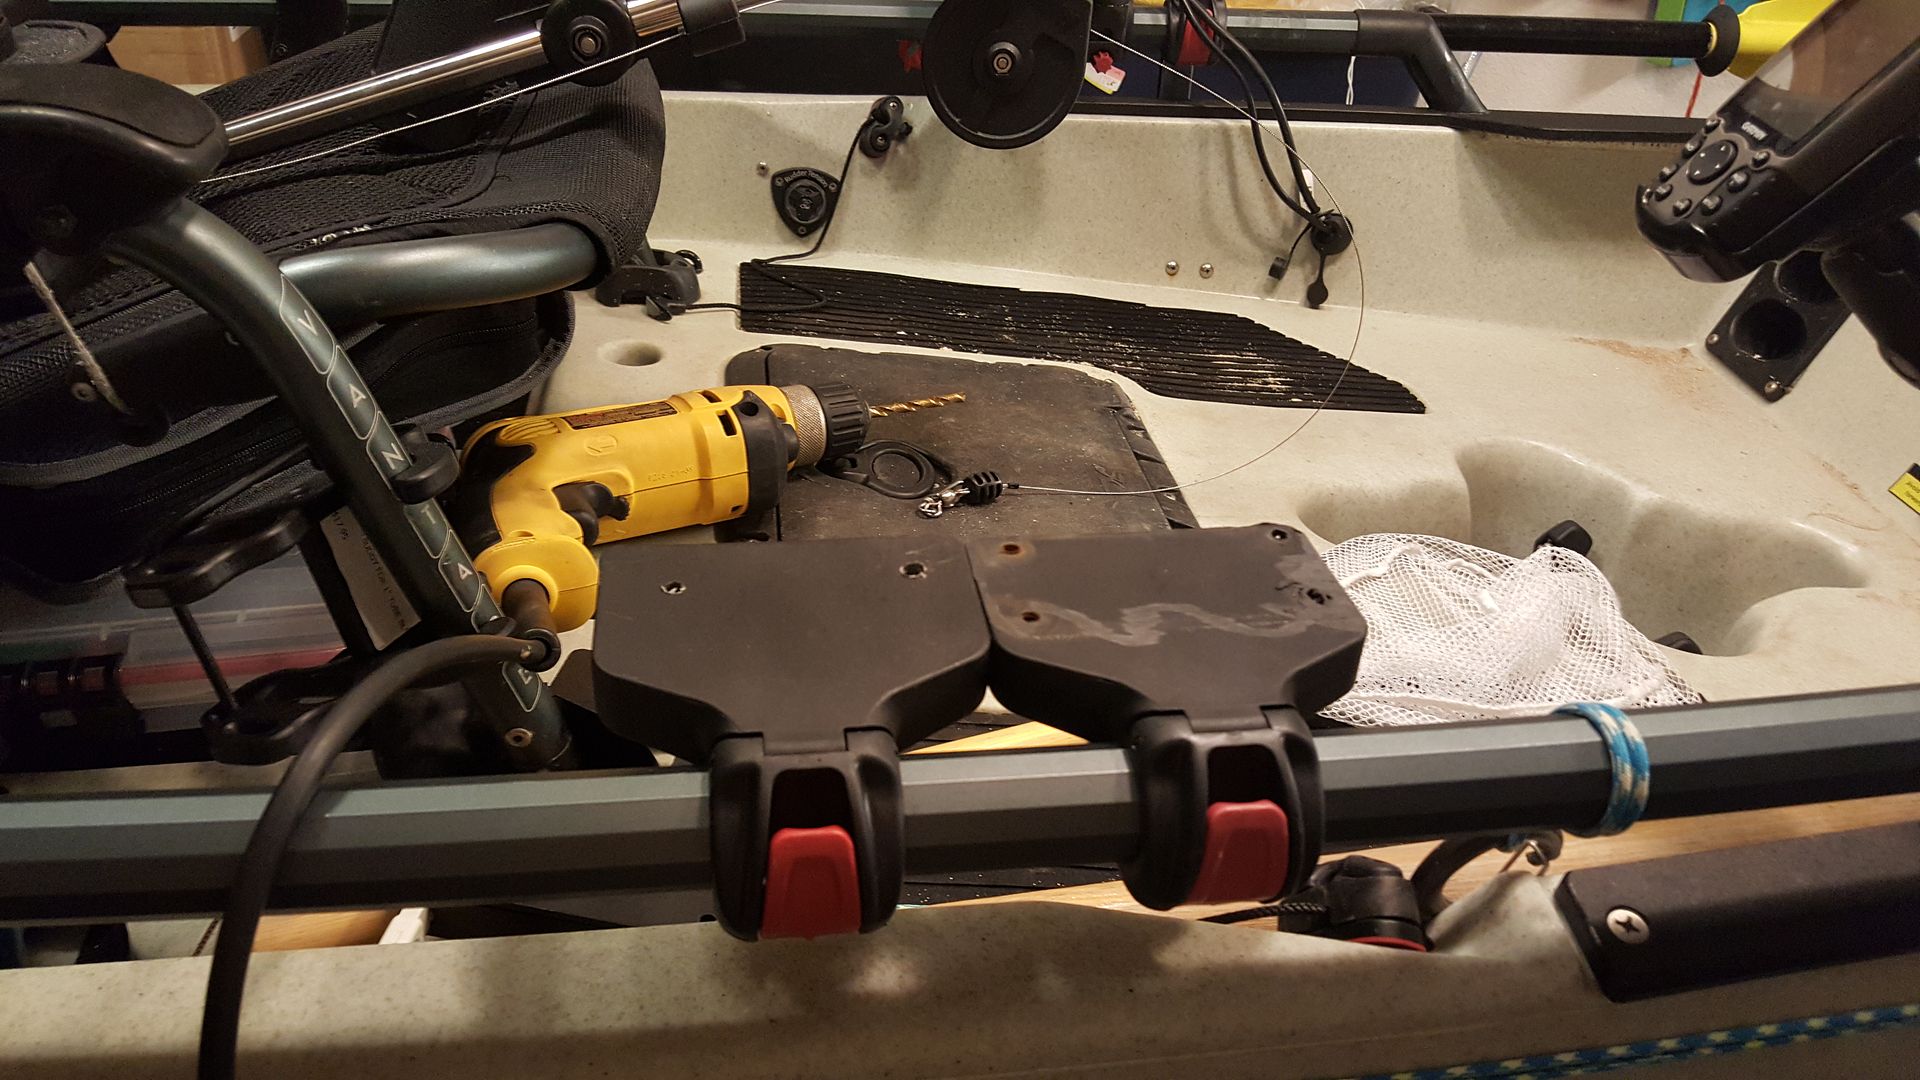
here are the parts im thinking along with the "receiver" base of the downrigger.
Image

Planned steps,

Cut a pattern out of the cutting board.
put the two universal H-rail mounts on the h-rail
place the cutting board and drill the 4 mounting holes thru the cutting board and universal plates lined up with the downrigger base.
bolt everything together and slide the downrigger into the receiver.

Questions,

1. What are the thoughts on the universal mounts supporting the downrigger? (w/ 4lbs ball and line) Trolling at around 2.5 or 3 mph

2. Should i shorten the arm on the downrigger from the stock length? the counter is a nice feature to have but i am not all that worried about haveing to adjust the count due to length.


3. Should i not mount it this way and just get the rail mount?


Man eventually i think i would quit adding to this tank!
Thanks ahead of all the support and knowledge you guys are sharing and any help with this mount! Hoping to get it mounted prior to sunday unless i need to get a different mount for it.


Top
 Profile  
 
PostPosted: Fri Jul 24, 2015 1:17 pm 
Offline
Site Rank - Old Salt

Joined: Thu Dec 10, 2009 2:40 pm
Posts: 1372
I have a 2013 PA-14 and not the PA-17, but I can share some of my experience mounting and using the Scotty 1050 Depthmaster.

First of all, I really like the Depthmaster 1050, but I would advise you to reduce the length of the boom/arm to make it easier to recover the weight and a shorter arm reduces the "moment" out past the hull.
I cut my arm down to 12" and have been thinking of reducing it to 8".

It's a little off topic from your questions, but due to the amount of force applied to the hull mounting board on my PA-14, I thought it was worth while to comment for other PA owners who will read this post....
Since my PA has the black plastic mounting boards I found that there was some significant flex when I used my 4 pound weight while trolling a K15 size lure at 70'.
The attached photo's show what I did to stiffen the black mounting board. With your H-Rail system, the rails should not twist by their design, assuming the supports are very strong.

I also replaced the Scotty SS cable with 200 feet of 175 pound test Scotty premium power braid.....it has reduced to cable hum to almost nothing.
I spliced on the power braid on to the end of the SS cable, laid 3 wraps of blue painters tape over the SS cable and continued to wind the power braid on to the drum......the counter accuracy is still very accurate. The painters tape separates and cushions the power braid on top of the SS cable.
I typically troll at 1.6 to 2.2 mph....average is 1.8 mph over 8-10 miles.

I can only assume that Hobie has taken into consideration that a down rigger will be a common add on by fisherman, so I am with you to use a white plastic board mounted to a pair of the H-Rail mounting plates. This will help to "spread/share the load" and you can still remove it when desired.
The H-Rail makes it easy to position your down rigger, where it is easy to reach/operate....in a "Chinese fire drill on deck", that is really important!

Good luck with your project...

Image ImageImage

_________________
Dr.SteelheadCatcher
Warrenton, OR


Top
 Profile  
 
PostPosted: Fri Jul 24, 2015 7:32 pm 
Offline
Site Rank - Old Salt

Joined: Sat May 01, 2010 5:03 pm
Posts: 422
Location: Charlevoix, MI
Hey BK -
I also have the 1050 on my 2011 PA14 and love it. I cut the arm waypoint down, as Doc suggested. This is not only safer, but makes it easier to deploy and retrieve. I bolted mine to the deck, using 2 pieces of breadboard material to elevate and mate it tightly to the deck contour. Mine is just behind the seat, so I can check the depth readout, play out line, work the brake and pull up line without leaving the seat or leaning too much. My rod holder is forward so that I can easily let line out of the fishing reel at a controlled rate as the ball goes down and you pedal - want to keep the lure played out behinds and not above the ball as things go down so this is a ballet dance. I find that positioning thing's in such a way that you simultaneously have control of the fishing reel, the downrigger reel, and the pedals is quite helpful. I always pull the ball up when I get a fish on to avoid tangling, again requiring simultaneous hands-on work with rod and downrigger. And you definitely want to replace the SS cable with braid. Much easier pedaling and less vibration. Good luck!


Top
 Profile  
 
PostPosted: Fri Jul 24, 2015 11:05 pm 
Offline
Site Rank - Captain

Joined: Thu Sep 25, 2014 3:08 pm
Posts: 63
Thanks both of you for the pointers, sorry i should have mentioned 2015 PA14 not a 17 but regardless the rail is still what looks like the best option as far as being able to remove it and stuff. will get the 2 mounts on and the board and show the progress. Doc how hard is it to cut off the arm to shorten it? i glanced at the downrigger but really didn't pay attention to how it would come apart to get to the arm. will look at it tonight and see what i can figure out. will try and remember to document the process. Thanks again guys!


Top
 Profile  
 
PostPosted: Sat Jul 25, 2015 1:50 am 
Offline
Site Rank - Captain

Joined: Thu Sep 25, 2014 3:08 pm
Posts: 63
Well i decided to do it after work tonight :) Overall it went fairly well. only one small hiccup and that was mounting the base to the mounts. it is wider than the universal mounts as far as where the bolt holes are on the base so i added a hole mid-way and that way it was bolted into the universal mounts. here is the process in pics

So here is why i couldnt mount it behind the seat like i wanted initially
Image


Here is the first layer. 2 universal H-rail mounts

Image

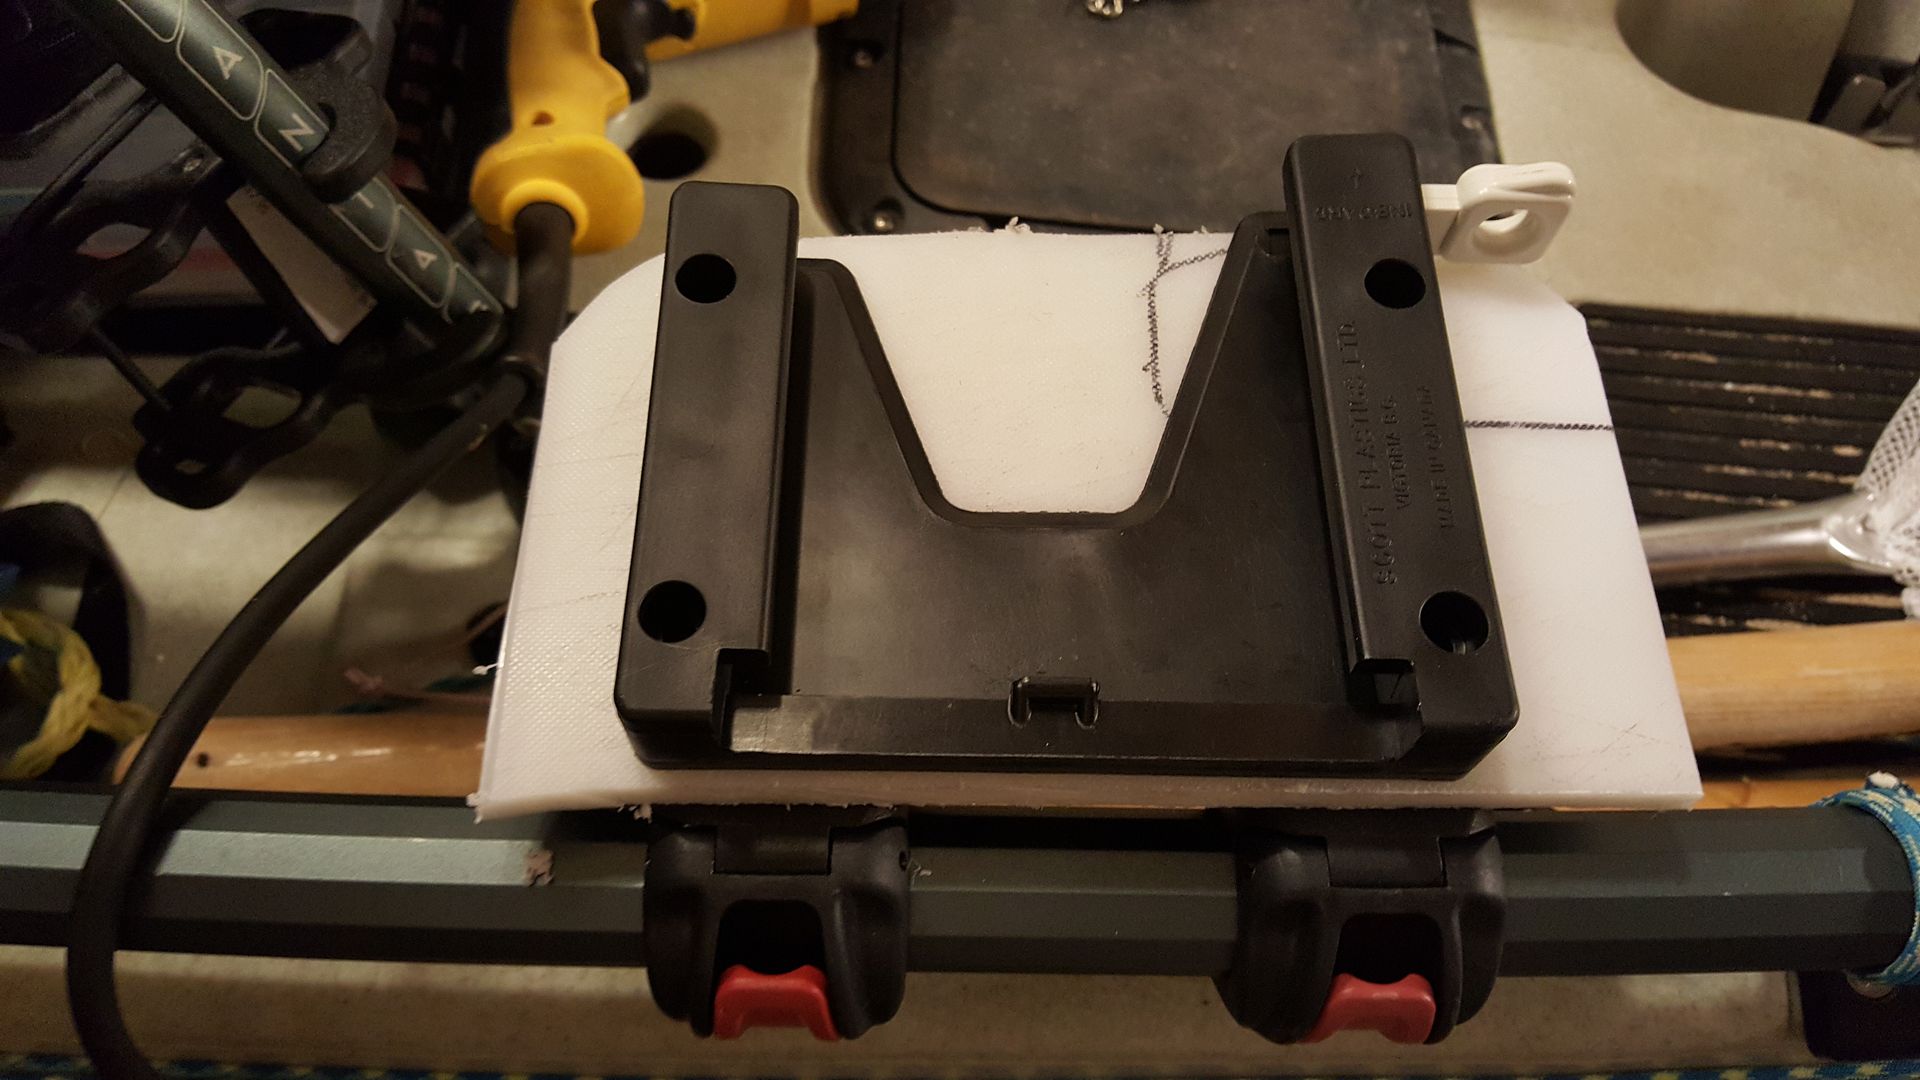
Add a layer of cutting board to combine the platform and add to the stability of the base

Image


How the base plate will be mounted (this is where i noticed the inboard holes were going to miss the universal mounts under the cutting board)

Image


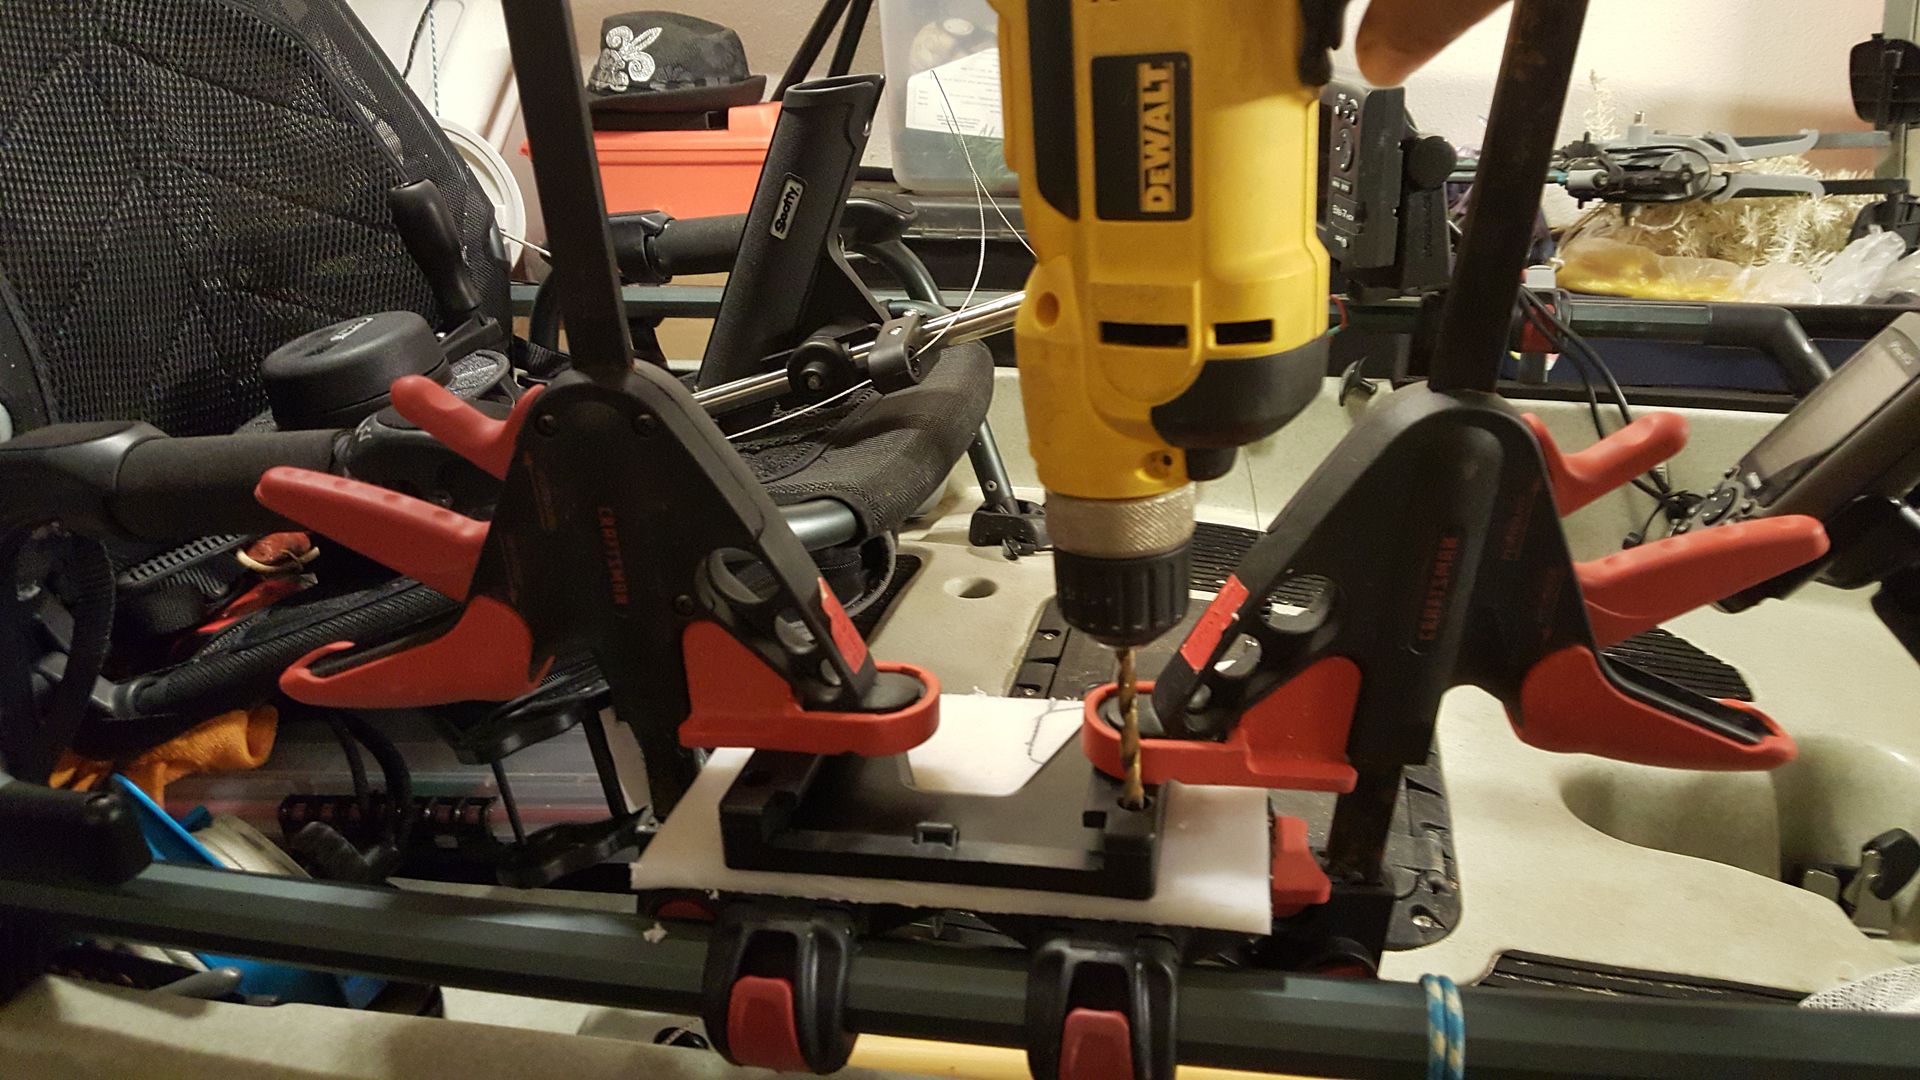
Drill the holes while everything is clamped together

Image

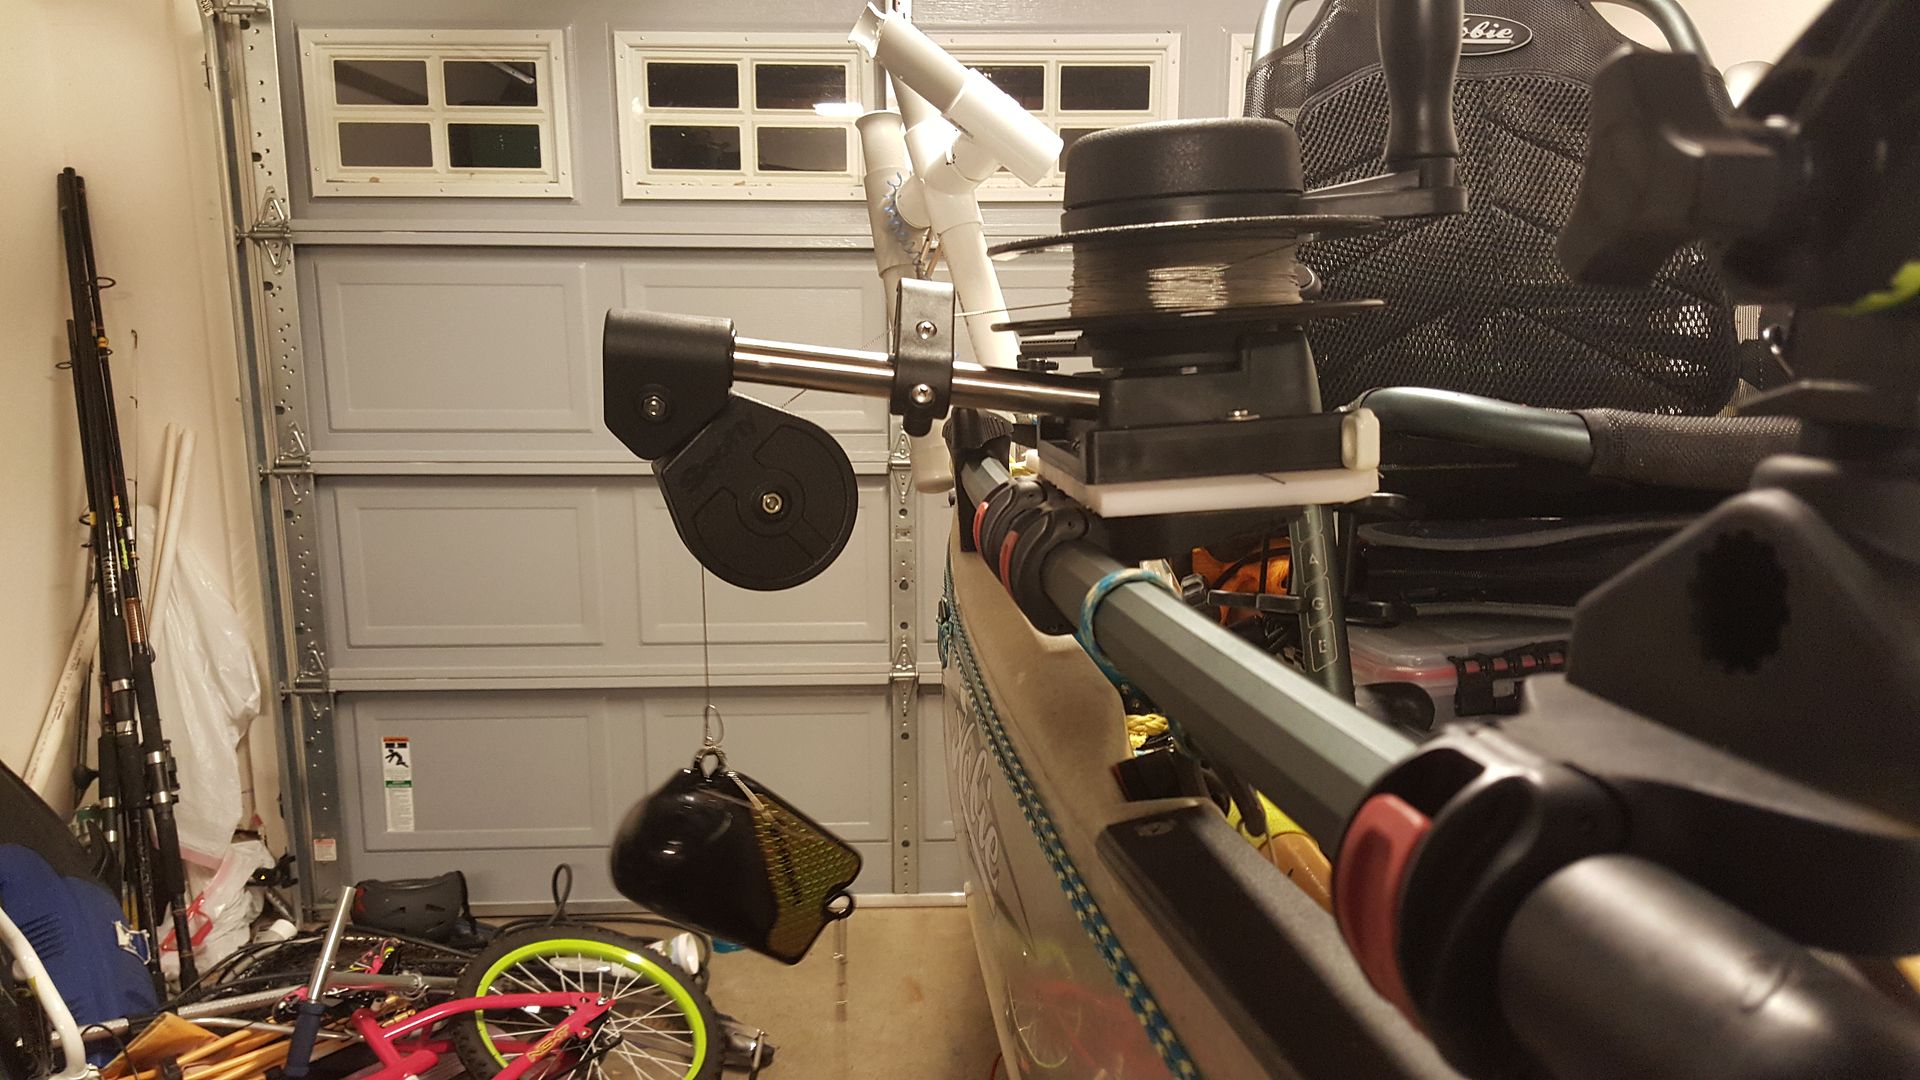
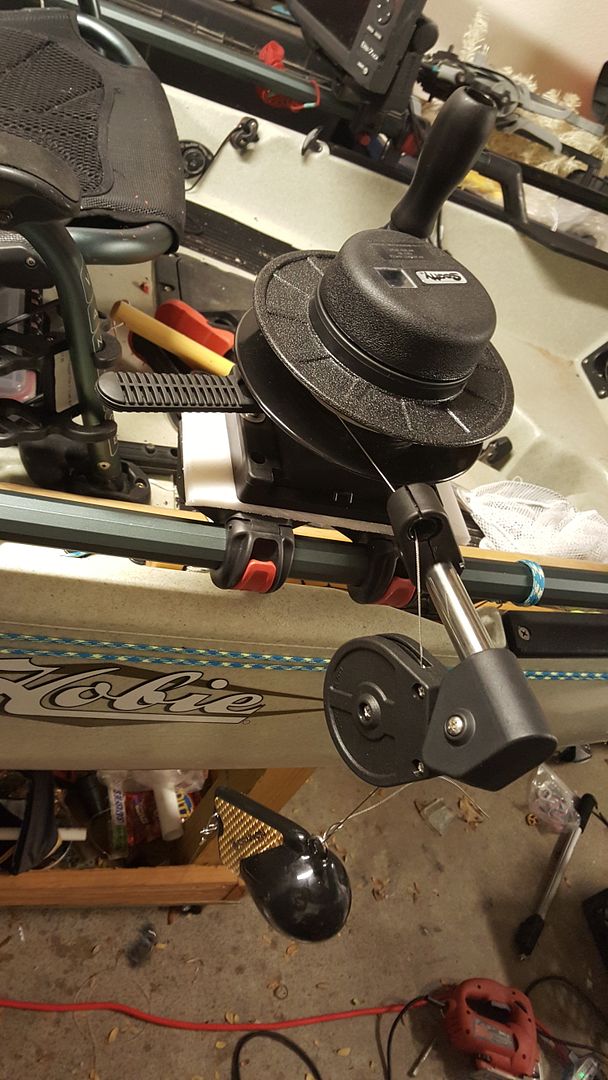
Mounted everything and checking out what Doc and Jim were saying about the arm and yup 100% agree it is too long for this mount

Image

Chopped it down to right around 10" total length of the arm so about 8" out of the base. just have to turn the first line guide up to help keep the line off the bottom of the spool

Image

Still need to add the braided line after the splice and then taping it but Very happy with it and will test it out on sunday but have high hopes! Thanks to Doc and Jim for the info and advise!

Now after working a 15 hour day and then sweating trying to quietly work on this in my garage before it got too late the only thing i can think to do... a little drink! Cheers all!

Image


note that the sarsaparilla Jeremiah Weed mixed with root beer is crazy dangerous lol you really dont taste anything but root beer and then your stuck wondering why your wobbly when you stand up!


Top
 Profile  
 
PostPosted: Sat Jul 25, 2015 6:30 am 
Offline
Site Rank - Old Salt

Joined: Thu Dec 10, 2009 2:40 pm
Posts: 1372
BadKarma....Nice work and I am sure you will be pleased with the overall performance of your down rigger.
Last week I hooked a 9# 13 oz and 2# 2 oz Rainbows only because I was able to troll at 28' below my kayak......

If cable hum becomes too noisy for you, Scotty's No. 2300K - 175lb. test - Low Drag Microfilament Power Braid Downrigger Line (Terminal Fastening Kit Included) is really good and IMHO, is worth the investment.

Your "relaxation drink" is almost as toxic as a "Haitian Rum Punch" made with 150 proof rum.....after two nice drinks, don't stand up!

_________________
Dr.SteelheadCatcher
Warrenton, OR


Top
 Profile  
 
PostPosted: Sat Jul 25, 2015 8:48 pm 
Offline
Site Rank - Old Salt

Joined: Sat May 01, 2010 5:03 pm
Posts: 422
Location: Charlevoix, MI
Dr.SteelheadCatcher wrote:
BadKarma....Nice work and I am sure you will be pleased with the overall performance of your down rigger.
Last week I hooked a 9# 13 oz and 2# 2 oz Rainbows only because I was able to troll at 28' below my kayak......

If cable hum becomes too noisy for you, Scotty's No. 2300K - 175lb. test - Low Drag Microfilament Power Braid Downrigger Line (Terminal Fastening Kit Included) is really good and IMHO, is worth the investment.

Your "relaxation drink" is almost as toxic as a "Haitian Rum Punch" made with 150 proof rum.....after two nice drinks, don't stand up!

BK-
We'll done! Although a bit of work up front, this will definitely simplify getting your lure down to the bigger gamefish. You're not targeting bass anymore! Let us know how you do.


Top
 Profile  
 
PostPosted: Sun Jul 26, 2015 7:33 am 
Offline
Site Rank - Old Salt

Joined: Sun Jul 18, 2010 12:55 pm
Posts: 420
Badkarma ......... Where did you get that aluminum channel stock ........ Exactly what I'm looking for


Top
 Profile  
 
PostPosted: Mon Jul 27, 2015 1:52 am 
Offline
Site Rank - Captain

Joined: Thu Sep 25, 2014 3:08 pm
Posts: 63
Memory Maker wrote:
Badkarma ......... Where did you get that aluminum channel stock ........ Exactly what I'm looking for


I think your meaning just the arm for the out rigger yeah? Just part of it that came with it.

Jim_MI wrote:
BK-
We'll done! Although a bit of work up front, this will definitely simplify getting your lure down to the bigger gamefish. You're not targeting bass anymore! Let us know how you do.


Yup for sure not targeting the bass unless i go up to the lake on the island ;) But here is a little video of the maiden voyage. I stuck a gopro to the side of the ball and then ran my flashers (1st time trying them out too) no hook ups on it but still tons of info learned from the footage!
https://www.youtube.com/watch?v=SELYSZzeOIM&feature=youtu.be


Top
 Profile  
 
PostPosted: Wed Aug 05, 2015 4:17 pm 
Offline
Site Rank - Captain

Joined: Fri Jun 06, 2014 1:23 am
Posts: 117
Location: MA
Badkarma, great work on the downrigger. I hope to be adding one to my 14 this season. Big thanks to all you guys for sharing your DIY info.

Stuff.... More stuff! Last week a guy in a boat asked me where I put the kitchen sink.

When I got back to the ramp another kayaker was putting in for a paddle with friends. He commented, "I don't know what all that stuff does but I'm glad humans know how to do that!" He just kept walking around the Hobie just shaking his head and smiling. He had never seen a mirage drive or such a heavily outfitted kayak before.

Guess that's the fun of owning a Hobie.

Tight lines.

_________________
Just a Kid to the End


Top
 Profile  
 
PostPosted: Mon Apr 04, 2016 4:04 pm 
Offline
Site Rank - Deck Hand

Joined: Fri Mar 11, 2016 1:03 am
Posts: 13
Location: New Braunfels TX
what happened to all the pics? I just bought a easy troll and very curious about how to mount it!


Top
 Profile  
 
PostPosted: Tue Apr 05, 2016 11:30 pm 
Offline
Site Rank - Captain

Joined: Thu Sep 25, 2014 3:08 pm
Posts: 63
not sure what the deal is. they are still on my fb page so not sure why the link died but i will post em back here. Good luck, the mount has worked great!
Image

Image

Image

Image

Image

Image


Top
 Profile  
 
PostPosted: Wed Apr 06, 2016 8:49 am 
Offline
Site Rank - Deck Hand

Joined: Fri Mar 11, 2016 1:03 am
Posts: 13
Location: New Braunfels TX
thank you for reposting! great pics will help a bunch!


Top
 Profile  
 
PostPosted: Thu Jul 28, 2016 11:07 pm 
Offline
Site Rank - Captain

Joined: Thu Sep 25, 2014 3:08 pm
Posts: 63
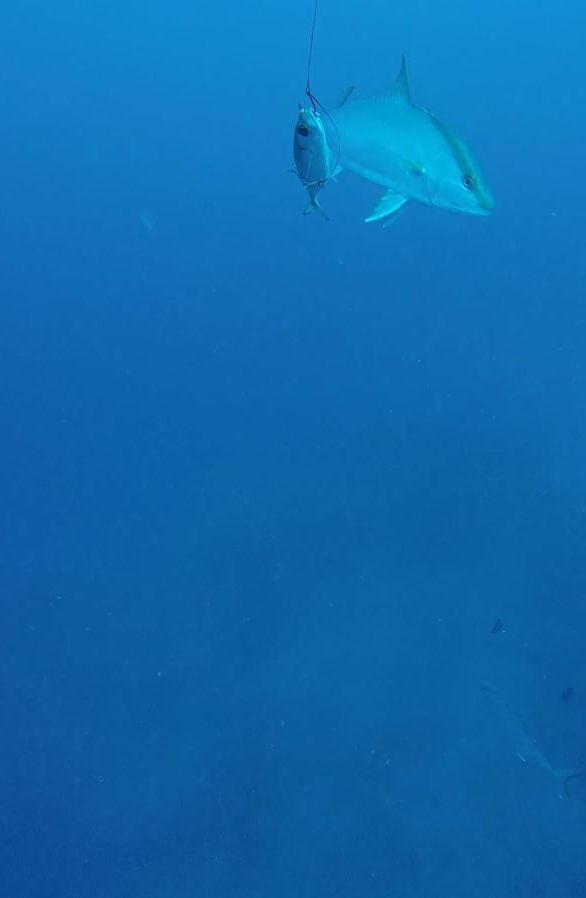
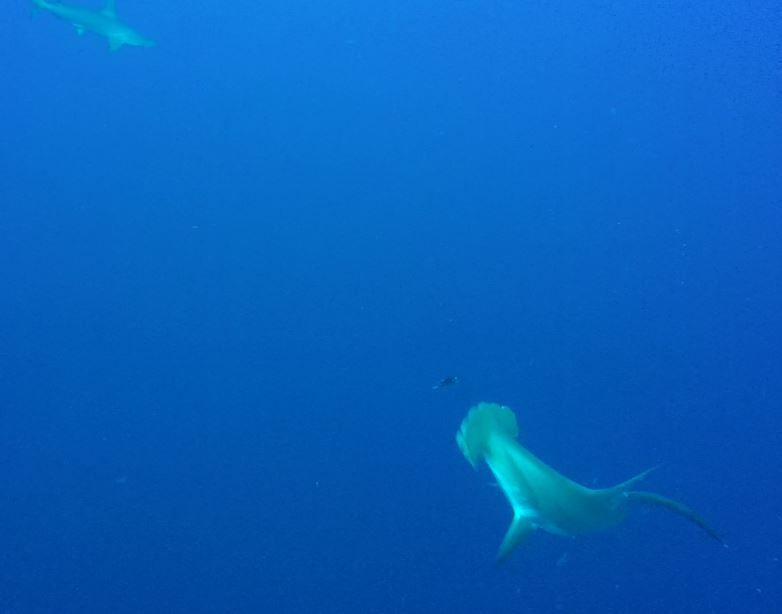
ok once again the photo links are gone so trying to get them up to keep them up on a different method. And will add a couple pics from things checking out my bait (added a gopro to the weight)

Image


Image

Image

Image

Image

Image

Image


Top
 Profile  
 
Display posts from previous:  Sort by  
Post new topic Reply to topic  [ 14 posts ] 

All times are UTC - 8 hours [ DST ]


Who is online

Users browsing this forum: Google [Bot] and 2 guests


You cannot post new topics in this forum
You cannot reply to topics in this forum
You cannot edit your posts in this forum
You cannot delete your posts in this forum

Jump to:  
© Hobie Cat Company. All rights reserved.
Powered by phpBB® Forum Software © phpBB Group