Return to Hobie.com
Hobie Forums
It is currently Tue Apr 16, 2024 4:22 am

All times are UTC - 8 hours [ DST ]


Post new topic Reply to topic  [ 66 posts ]  Go to page Previous  1, 2, 3, 4, 5  Next
Author Message
PostPosted: Wed May 14, 2014 9:02 pm 
Offline
Site Rank - Old Salt

Joined: Wed May 25, 2011 3:15 pm
Posts: 610
Location: Buffalo, NY
Roblox,

That downhaul system is custom, but it looks identical to one used by centralmichigansailor in his newly assembled H18. It may be helpful to scroll through his post, it may help clear some other things up, and the pictures are gorgeous. Here's the page with the downhaul: viewtopic.php?f=13&t=36064&start=30

You've gotta be careful when you step the mast to keep the jib halyard within reach, otherwise you have to pull the mast down or tip the boat on it's side (on the beach) to retrieve it. Sometimes when stepping the mast, shackles get "stuck" in the "wrong" orientation... just have to try and jiggle them loose or make sure it's all lined up right before you lift it.

I also agree with srm, ditch the pulley on the mast rotator. The line should go from the boom, through the v notch at the end of the mast rotator and back to the boom (through the jam cleat).

If the main halyard is exceptionally difficult to hoist, check the sheaves at the bottom and top of the mast. Mine had worn and were no longer rotating. You can also spray silicone lubricant in the mast track... just don't use a greasy lubricant.

All in all, not bad for a first setup. That's about how mine went. After a few times, you'll be amazed at how much simpler the whole thing seems to rig or de-rig. It's still time consuming, though. Trailer to water time is ~45 minutes for me at best.

Mast up storage is fine, if you have a beach or shoreline that you can keep it up, do it. You can be on the water in minutes! Most Hobie fleets have mast up storage for the boats on the beach. It's really the way they were meant to be stored, as long as it's not too exposed (lightning).

_________________
Mike
Image
'79 H18 standard 'Rocketman II' sail #14921 RIP
'78 H18 (unnamed) sail #14921
'08 H16 sail #114312
'97 H21SC sail #238


Top
 Profile  
 
PostPosted: Wed May 14, 2014 10:45 pm 
Offline
Site Rank - Captain

Joined: Fri Apr 18, 2014 8:01 pm
Posts: 49
SabresfortheCup......

Thanks for the added tips. You guys are a great help on this site and have really cleared some stuff up for me.

Once I try rigging again if we ever get a nice day I will let you guys know how it went and post some more pics.

We've been having hail and tornado warnings here in Ohio for the past few days, the weather here goes from one extreme to another of non stop snow to non stop rain, flooding and tornados.


Top
 Profile  
 
PostPosted: Thu May 15, 2014 12:16 pm 
Offline
Site Rank - Captain

Joined: Thu May 15, 2014 11:51 am
Posts: 28
Location: Orange Beach, AL
SabresfortheCup wrote:
That said, there were things I still had a hard time figuring out... the jib halyard and the main downhaul, for example. My 18 also had modified trapeze rigs that were trickier to figure out... mine were different from yours, they had the adjustable trapeze rig. I found it's best to learn by doing.


I've been learning by doing as well, but any chance you could post a pic of your downhaul setup if it is stock? Google image search hasn't revealed a stock rigged downhaul for me yet!


Top
 Profile  
 
PostPosted: Thu May 15, 2014 4:29 pm 
Offline
Site Rank - Old Salt

Joined: Wed May 25, 2011 3:15 pm
Posts: 610
Location: Buffalo, NY
aaronp wrote:
I've been learning by doing as well, but any chance you could post a pic of your downhaul setup if it is stock? Google image search hasn't revealed a stock rigged downhaul for me yet!


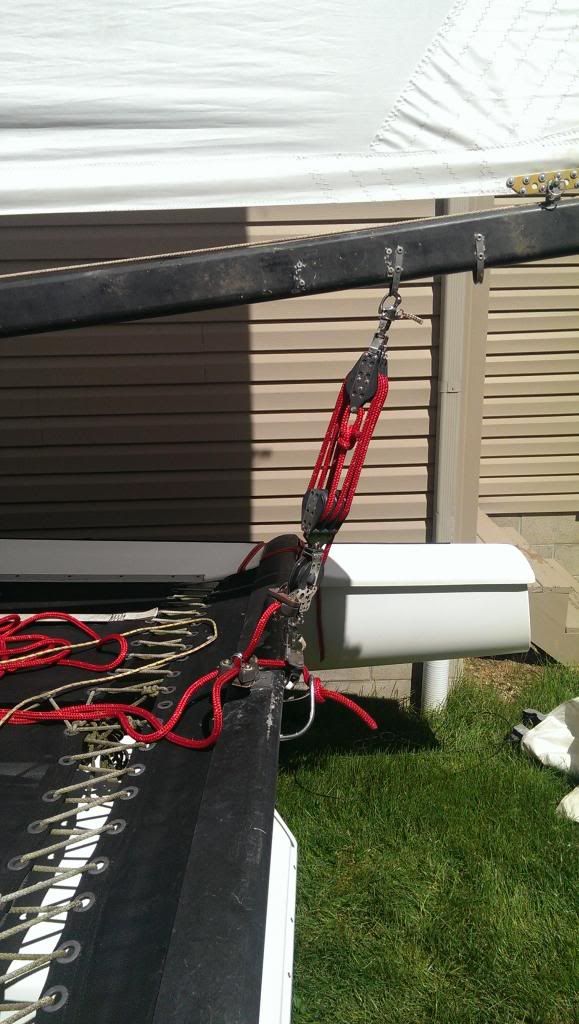
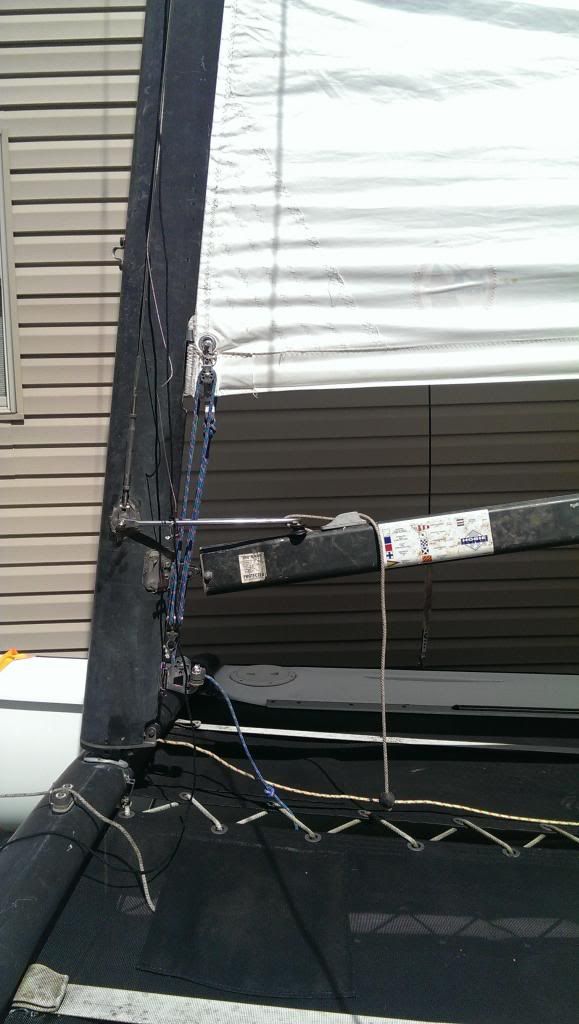
Aaron, roblox's downhaul system isn't stock, it's an upgraded 5:1 system. The stock system is pretty basic. You tie a 7' long 3/16" line to the grommet at the tack of the mainsail. On the port side of the mast, you will notice a sheave riveted to the side. The starboard side has a v-notch cleat (or jam cleat, depending on the age of the boat). The downhaul line goes down the port side, through the sheave, back up through the grommet at the tack of the mainsail, and then down the starboard side and through the cleat. 3:1 purchase.

Page 15 of the assembly manual (page 17 of the pdf) shows a picture of the stock downhaul: http://static.hobiecat.com/digital_asse ... Manual.pdf

_________________
Mike
Image
'79 H18 standard 'Rocketman II' sail #14921 RIP
'78 H18 (unnamed) sail #14921
'08 H16 sail #114312
'97 H21SC sail #238


Top
 Profile  
 
PostPosted: Sun May 18, 2014 3:45 pm 
Offline
Site Rank - Captain

Joined: Fri Apr 18, 2014 8:01 pm
Posts: 49
Well I broke my mast base today trying to step the mast with my wife so it'll be a while until I get to practice again.

I tried holding down then the mast while she went to pin the forestay, the mast went to the side and I couldn't hold it up any longer and the base just gave out. I also think I might have had the shrouds too loose, last time when I raised the mast there was no side to side play but before I took the mast down I loosened the shrouds.


Top
 Profile  
 
PostPosted: Sun May 18, 2014 7:11 pm 
Offline
Site Rank - Old Salt

Joined: Wed May 25, 2011 3:15 pm
Posts: 610
Location: Buffalo, NY
roblox, so sorry for your misfortune. As for the cause, it's unlikely that the shrouds were too loose... when stepping the mast, the shrouds are usually pinned at the top hole in the adjuster, then tightened after. The "old style" rigging had longer shrouds with 7 hole adjusters, while the newer rigging has shorter shrouds with 10 hole adjusters. I suppose if you had older shrouds with newer adjusters, this could allow for a little more play, but I don't think it would be enough to cause the mast to come down. With the mast pushed as far forward as possible, there still shouldn't be any side to side play, and the mast shouldn't be very difficult to hold in place, since you should mostly just be holding it forward... the weight of the mast should be entirely on the crossbar. At least no one was hurt, and the boat/mast is still intact.

Did you break the mast base, mast hinge or mast step? I know the mast hinge (60650011) commonly breaks if the mast is side loaded, $47 to replace. The mast base (60641031) is $44, and the mast step (unlikely to break) would probably require the entire mast step assembly (60180011) on an older H18, $102. The mast base would need to be re-riveted with 8010131 rivets (3/16" x 3/8" long monel rivets) and 8011291 rivet caps, 2 of each. Hand held riveters are pretty cheap (~$20) and easy to use. Things happen. I damaged my rotation bar and a diamond wire turnbuckle my first few times out at $45 & $30 each.

There aren't many Hobie dealers in the area, and none within reasonable driving distance of Cleveland, at least. I seem to recall there's Strictly Sail (www.strictlysailinc.com) in Cincinnati. I typically order my parts through Backyard Boats in Maryland (www.backyardboats.com). Either way, you should have your replacement parts in a few business days.

_________________
Mike
Image
'79 H18 standard 'Rocketman II' sail #14921 RIP
'78 H18 (unnamed) sail #14921
'08 H16 sail #114312
'97 H21SC sail #238


Top
 Profile  
 
PostPosted: Sun May 18, 2014 7:42 pm 
Offline
Site Rank - Captain

Joined: Fri Apr 18, 2014 8:01 pm
Posts: 49
The part that broke was the casted hinge piece and I already ordered one from a place in Cincinnati for about $50 so hopefully I'll get it within one or two days since I'm only 3 hours away.

I should have also specified that the mast wasn't all the way up, I was going to have my wife pull on the forestay but before she could help me I lost the balance of the mast and in reading your post i'm guessing now that is why there was so much side to side play. I also used the actual mast pin this time instead of a screw driver and I think the screw driver was thicker than the pin and didn't allow the mast to twist so much on the base?

That mast is a heavy sucker so next time I'm not doing it by myself and my wife will help me raise it and then jump down from the tramp and pin it.


Top
 Profile  
 
PostPosted: Sun May 18, 2014 7:54 pm 
Offline
Site Rank - Old Salt

Joined: Wed May 25, 2011 3:15 pm
Posts: 610
Location: Buffalo, NY
I see... that will do it! It's always easier to have your crew help you get the mast all the way up. The two of you will have an easier time keeping it stable, and once it's all the way up it's simple enough to pin the forestay.

Regardless of how you pin it, the hinge isn't strong enough to keep the mast in the right orientation coming up. Any twisting/side to side motion like that will break the hinge.

All part of the learning process!

_________________
Mike
Image
'79 H18 standard 'Rocketman II' sail #14921 RIP
'78 H18 (unnamed) sail #14921
'08 H16 sail #114312
'97 H21SC sail #238


Top
 Profile  
 
PostPosted: Fri May 23, 2014 3:39 pm 
Offline
Site Rank - Captain

Joined: Fri Apr 18, 2014 8:01 pm
Posts: 49
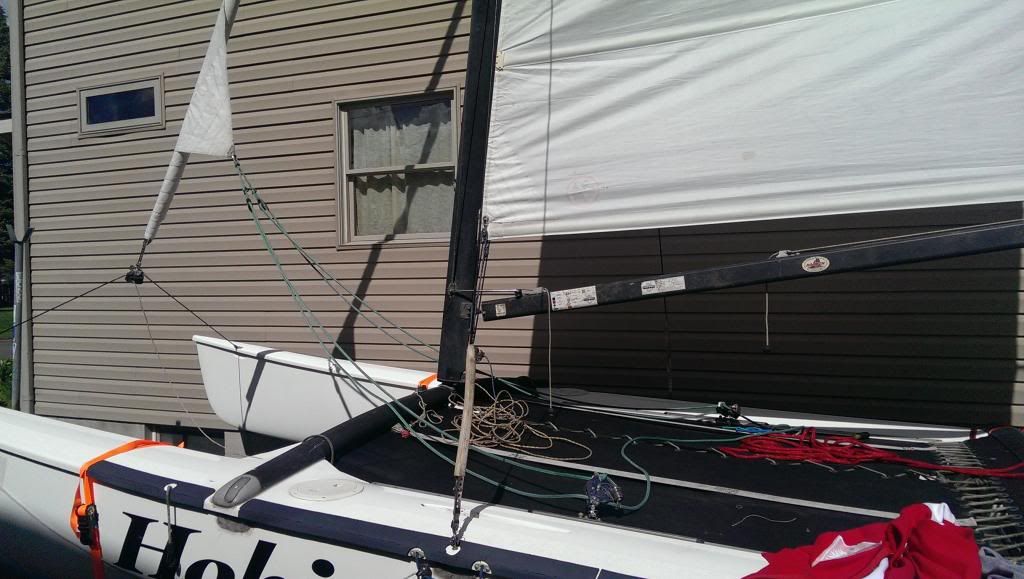
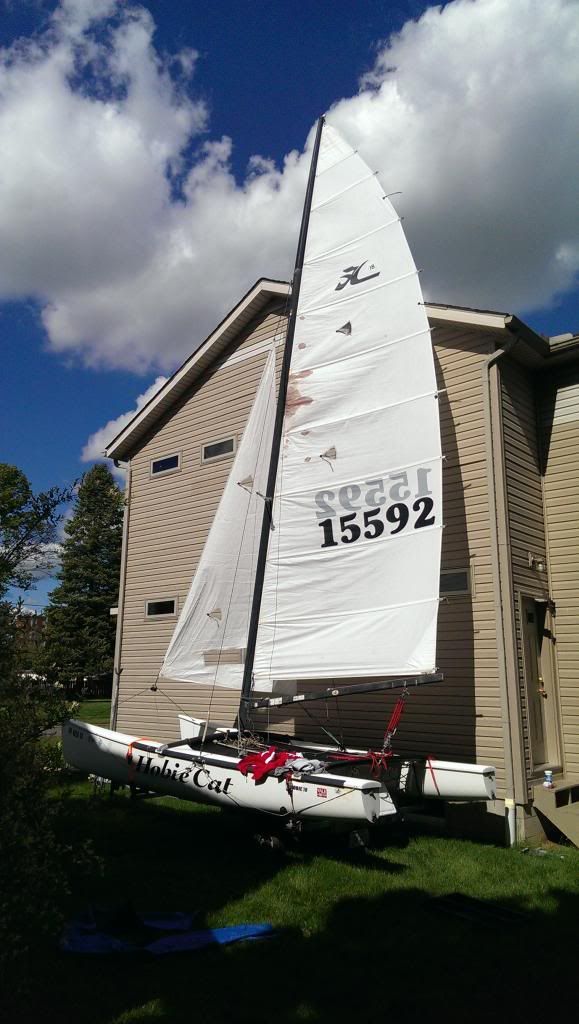
I got the replacement hinge in a few days ago and we basically had the whole boat rigged up today, except for the jib. This time we used the other sails which aren't in the best condition.

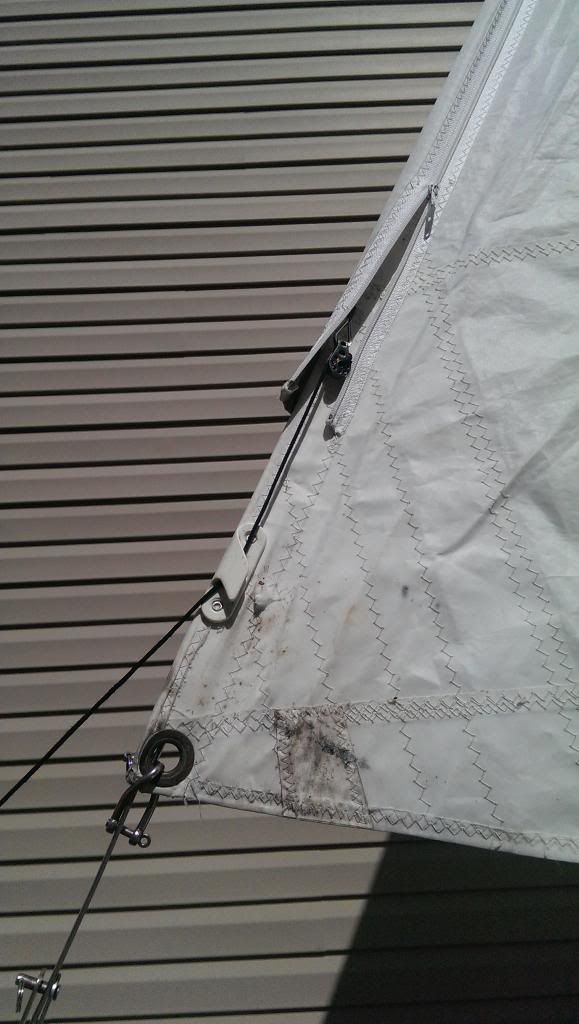
Looking at the picture would anyone be able to explain how to finish rigging the jib? One video on YouTube mentioned a 3 foot piece of rope going somewhere but I don't know if this piece of rope goes through the pulley or what. Or can I run the black rope through the shackle then up through the pulley and then pull down to tighten the sail?

Image


Top
 Profile  
 
PostPosted: Fri May 23, 2014 3:54 pm 
Offline
Site Rank - Captain

Joined: Fri Apr 18, 2014 8:01 pm
Posts: 49
Image
Image
Image
Image
Image


Top
 Profile  
 
PostPosted: Fri May 23, 2014 6:18 pm 
Offline
Site Rank - Old Salt

Joined: Mon May 09, 2005 10:25 am
Posts: 4178
Location: Jersey Shore
roblox84 wrote:
Looking at the picture would anyone be able to explain how to finish rigging the jib? One video on YouTube mentioned a 3 foot piece of rope going somewhere but I don't know if this piece of rope goes through the pulley or what.


The jib halyard system operates by using two lines. The first line is the "halyard" line, which is the long (about 20 feet) thin line. It is the black line in your picture. Then there is a second line, the "tensioner" line. The tensioner line is 1/8" to 5/32" diameter and only about two feet long. The tensioner line is tied off at one end to the tack shackle (the shackle that connects the grommet at the bottom, forward corner of the jib to the forestay adjuster). Once you've raised the sail using the halyard line (as you have done in the picture) take the tensioner line and run it up through the small pulley at the end of the wire halyard and back down to the cleat on the jib. This gives you a 2:1 purchase for tensioning the jib luff. Once you've cleated off the tensioner line, untie the halyard line completely, coil it up, and stow it in the tramp pouch until you're ready to bring the jib down. Be sure to tie off the tensioner line securely after cleating it - you don't want to rely just on the cleat.

A couple other comments - I would move the tack shackle down on the adjuster plate so the jib is lower. Move it to one or two holes above the furler. I would also replace that twist shackle with a standard bow shackle. I would also ditch the ratchet strap tie-down belts wrapped around the front of the hulls. Those straps can do a lot of damage if someone goes overboard with tightening them. I suggest you secure the boat using by tying off to the crossbars rather than going over the hulls.

sm


Top
 Profile  
 
PostPosted: Fri May 23, 2014 8:01 pm 
Offline
Site Rank - Captain

Joined: Fri Apr 18, 2014 8:01 pm
Posts: 49
Thanks for the explanation and the added comments, that really helped allot. I feel comfortable now being able to properly rig everything so hopefully this Tuesday we'll go out sailing on our day off.

I was also thinking those ratchet tie downs could cause some damage so I didn't push it hard, just tight enough to keep the boat from bouncing up of the rollers. I will look under the cross bars on the trailer for tie off points but the cat box under there might get in the way.


Top
 Profile  
 
PostPosted: Fri May 23, 2014 10:01 pm 
Offline
Site Rank - Admiral

Joined: Sat Jul 23, 2005 10:04 am
Posts: 236
Location: Bowie, MD
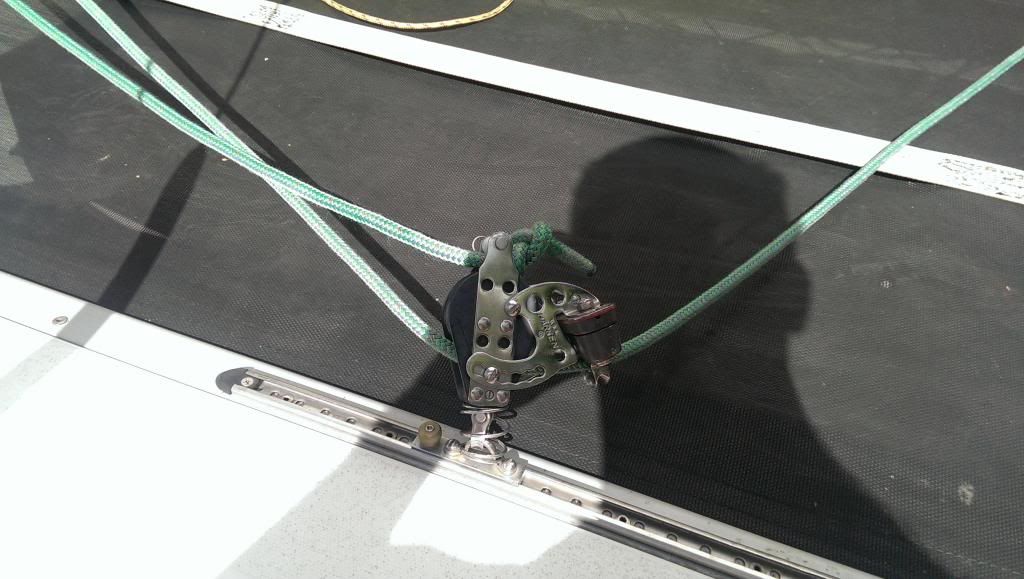
Somewhat hard to tell from the picture, but it looks like you might not have your mainsheet rigged quite right. Looks like it might be coming out of the lower block cleat and going directly into the traveler cleat. Should come out of the lower block cleat, then have most of the mainsheet on the tramp. The free end should then run through the traveler cleat (from fore to aft), then through the traveler, then tied off to the dead-eye.

Jim


Top
 Profile  
 
PostPosted: Fri May 23, 2014 11:13 pm 
Offline
Site Rank - Captain

Joined: Fri Apr 18, 2014 8:01 pm
Posts: 49
jim-doty wrote:
Somewhat hard to tell from the picture, but it looks like you might not have your mainsheet rigged quite right. Looks like it might be coming out of the lower block cleat and going directly into the traveler cleat. Should come out of the lower block cleat, then have most of the mainsheet on the tramp. The free end should then run through the traveler cleat (from fore to aft), then through the traveler, then tied off to the dead-eye.

Jim


Yeah I know what you mean, looking back at that picture confused the heck out of me because I know I didn't have it like that. It must be some weird illusion but I'm pretty sure I had it rigged just add you described.


Top
 Profile  
 
PostPosted: Sat May 24, 2014 5:25 am 
Offline
Site Rank - Old Salt

Joined: Mon May 09, 2005 10:25 am
Posts: 4178
Location: Jersey Shore
roblox84 wrote:

I was also thinking those ratchet tie downs could cause some damage so I didn't push it hard, just tight enough to keep the boat from bouncing up of the rollers.


It's not just the strap tension that can cause dammage. The strap itself vibrating in the airstream as you drive can cause damage. Also the bulky ratchet mechanism whacking into the side of the hull is not good.

Speaking of rollers, a single roller on the front trailer crossbar is not good. It will point load the hull and can eventually punch through the bottom of the hull. Hull cradles are a much better idea. You can make up some really quick cradles using 10" PVC pipe and carpet slipped between the hull and the roller and secured in place. A 10" long piece of 2x6 with some carpet on top will even work in a pinch - anything to help spread out the load. Or you can make something more elaborate or buy the Hobie cradles. Just be sure to avoid a single roller in the front.

sm


Top
 Profile  
 
Display posts from previous:  Sort by  
Post new topic Reply to topic  [ 66 posts ]  Go to page Previous  1, 2, 3, 4, 5  Next

All times are UTC - 8 hours [ DST ]


Who is online

Users browsing this forum: No registered users and 2 guests


You cannot post new topics in this forum
You cannot reply to topics in this forum
You cannot edit your posts in this forum
You cannot delete your posts in this forum

Jump to:  
© Hobie Cat Company. All rights reserved.
Powered by phpBB® Forum Software © phpBB Group