Return to Hobie.com
Hobie Forums
It is currently Tue Apr 16, 2024 7:12 am

All times are UTC - 8 hours [ DST ]


Post new topic Reply to topic  [ 6 posts ] 
Author Message
PostPosted: Thu Mar 22, 2007 9:32 pm 
Offline
Hobie Approved Guru

Joined: Sat Nov 12, 2005 10:46 pm
Posts: 3017
Location: Escondido
NOTE: 06-12-07 HOBIE IS NOW PRODUCING THE BALANCED RUDDER, MAKING THIS MODIFICATION UNNECESSARY. THE HOBIE VERSION GIVES AN EXCELLENT RESULT AND HAS THE ADDITIONAL STRENGTH OF ALL SIX SCREWS. 8)

For those who are experiencing a heavy helm with the AI, here's a "how to" for improved rudder balance. When done, it should feel much lighter to the touch at speed. The rudder will be remounted forward by one screw position. This requires some minor modifications to both the rudder and Twist & Stow (T&S) mount, so lets begin:

Tools needed -- Phillips screwdriver, hack saw, file, drill, pencil, ruler.

1. Modifying the T & S rudder interface:
--position the hull upside down on a set of saw horses for easy access.
--remove the rudder and set aside.
--find the three protrusions on the T&S rudder interface that must be filed/sanded off*. (* update 04-18-07 -- Yakaholic pointed out it is not necessary to remove the forward notch (right side of picture below) in order to make the mod; the modified rudder will butt right up against it). Here's the "before picture:
Image

and the"after" (you can do this without dismounting the T&S):
Image

2. Modifying the rudder head:
-- there will be two areas to trim at the rudder head; you'll cut off a portion forward of the upper middle nut and trim the drop-off behind the aft upper nut as shown (upside down in this view):
Image

Here's another view of what it will look like when done:
Image

Finally, here's what it looks like when mounted. Take a good look at your two clearance areas before cutting. Notice you have to leave clearance for the notch flange (shown on the right):
Image

3. Re mounting the rudder:
-- You'll have to move three of the four holes in the T&S slightly. Begin by screwing the rudder on using the hole shown. Check for proper fit and alignment before tightening:
Image

-- re-align the other three holes using the drill and insert the screws:
Image

4. Trimming the rudder for hull clearance:
--mount the rudder in the full down position and place it next to the hull. Using a pencil, mark the overlap area on the rudder:
Image

--add about 1/4" to your line. this will be your cut line. It should look something like this ( I marked a one inch reference line so I could give you my final cut out size -- coming up next:
Image


re-trim as necessary. My cut-out was four inches long, cut in one inch at the top and 5/8" at the bottom; then trimmed and rounded with the file:
Image

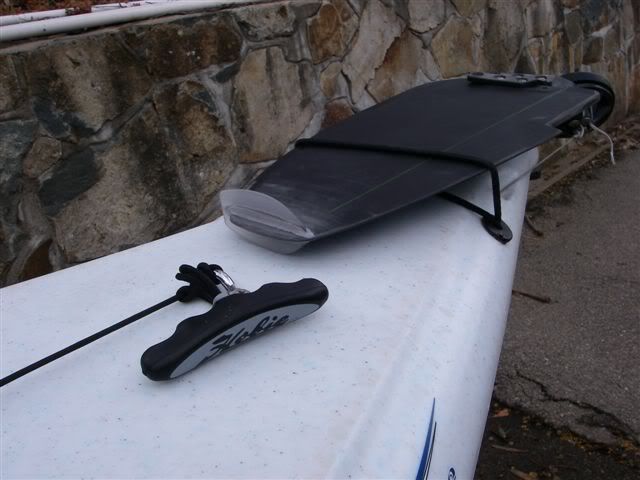
Here's the final product:
Image

Not nearly as difficult as it seems. If you have any questions I'll try to answer them. You can return the rudder to its original position if you don't like the results; it just won't look as pretty. You can also adjust the balance beyond this, but we can cross that bridge later if anyone wants to.

As to the question of strength, I believe the original rudder mount was waaaay over engineered. As modified, everything feels very solid -- I don't see it as a cause for concern. 8)


Last edited by Roadrunner on Tue Jun 12, 2007 10:05 pm, edited 3 times in total.

Top
 Profile  
 
 Post subject:
PostPosted: Mon Mar 26, 2007 6:02 am 
Offline
Site Rank - Old Salt

Joined: Fri Mar 23, 2007 8:12 am
Posts: 441
Location: Florida
Hey there I'm Yakaholic, some of you may know me from posts on the KFS forum.

My first post here.

I'm surprised there has been no discussion on the rudder mod, but I am here now to say just how well this mod works. With all my sailing I was actually getting carpal t. on my left hand from constantly batteling the rudder while under sail. This mod provides a dramatic improvement to rudder ease of use and rudder response when sailing.

Big thanks to Roadrunner for all his instructions - which are very accurate BTW - and thanks to Josh & others who developed this quite needed mod.

Yakaholic

Image


Top
 Profile  
 
 Post subject:
PostPosted: Fri Mar 30, 2007 3:33 pm 
Offline
Site Rank - Deck Hand

Joined: Wed Mar 14, 2007 3:03 pm
Posts: 9
Thanks Guys,
I recently bought a AI and love it. The muscle in my thumb will love the mod. I did it in a little over a hour with a jig saw and a dremel tool. I read all you guys post and decided on the AI because of them. Thanks and may the wind fill your sails and the lord bless your lives.

Kemo


Top
 Profile  
 
 Post subject:
PostPosted: Mon Apr 02, 2007 7:37 am 
Offline
Site Rank - Deck Hand

Joined: Tue Feb 20, 2007 1:27 pm
Posts: 7
Location: Wichita, KS
Thanks to all who came up with this fix! I went ahead and added the third bolts aft by using fender washers and a rubber spacer between the tapered part of the rudder and the base. I used a hand hack saw since the Dremel was having a tendency to melt the carboxylate.

Keep on posting!

John


Top
 Profile  
 
 Post subject:
PostPosted: Fri Apr 06, 2007 8:56 pm 
Offline
Site Rank - Old Salt

Joined: Fri Mar 23, 2007 8:12 am
Posts: 441
Location: Florida
Read about the REDBULL project posted at KFS.


Image


http://kfs.infopop.cc/eve/forums/a/tpc/f/5086057385/m/2761090753

Thanks Roadrunner

Yakaholic

(It gives you wings)


Top
 Profile  
 
 Post subject:
PostPosted: Fri Apr 06, 2007 10:09 pm 
Offline
Hobie Approved Guru

Joined: Sat Nov 12, 2005 10:46 pm
Posts: 3017
Location: Escondido
Yak and I have both been testing this winglet for over a week so far on the rudder mod posted above. We've both observed improved rudder authority and speed with the rudder mod alone. The winglet further improves rudder responsiveness while reducing twitchiness at the higher speeds, as well as providing better control in potential broach situations.

At only 4 sq. in., the winglet is essentially unnoticeable in straight, balanced running. But to the extent slideslip and rudder course corrections are occurring, the winglet seems to improve the efficiency of the rudder by requiring less deflection, therefore less drag and more speed. For example, when riding boat wakes the oblique angle causes quite a side load on the rudder. The deflection necessary to keep from broaching often slows the boat enough to kick it out of the wake. The winglet improves this situation dramatically.

Yak is getting excellent results with the winglet at faster sailing speeds, where the handling benefits become increasingly noticeable.

So far we have found both mods work well with each other to make a significant improvement on the AI handling. 8)


Top
 Profile  
 
Display posts from previous:  Sort by  
Post new topic Reply to topic  [ 6 posts ] 

All times are UTC - 8 hours [ DST ]


Who is online

Users browsing this forum: No registered users and 2 guests


You cannot post new topics in this forum
You cannot reply to topics in this forum
You cannot edit your posts in this forum
You cannot delete your posts in this forum

Jump to:  
© Hobie Cat Company. All rights reserved.
Powered by phpBB® Forum Software © phpBB Group